Before Installation
2
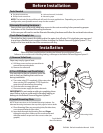
• Flat head screwdriver • Universal wrench (included)
• Phillips head screwdriver • Measuring tape
NOTE: The included Universal Wrench will work for most applications. Depending on your toilet
confi guration, an adjustable wrench may also be needed.
Tools Needed
Alternate Mounting Hardware
Check Water Supply Line
Some toilets may not provide adequate access to the seat mounting holes preventing proper
installation of the Standard Mounting Hardware.
In this case you will need to use the Alternate Mounting Hardware and follow the enclosed instructions.
Check the line that connects the toilet tank to the water shut-off valve. If it is rigid pipe, you may need
to purchase a flexible hose to replace it before installing the Refresh Personal Hygiene System™. The
length of the hose and the size of the connectors will vary.
CAUTION CAUTION
Installation
Please read these carefully before installing the Refresh Personal Hygiene System™.
Failure to do so could result in flooding, leaking, or damage to the Refresh Personal Hygiene System™.
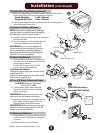
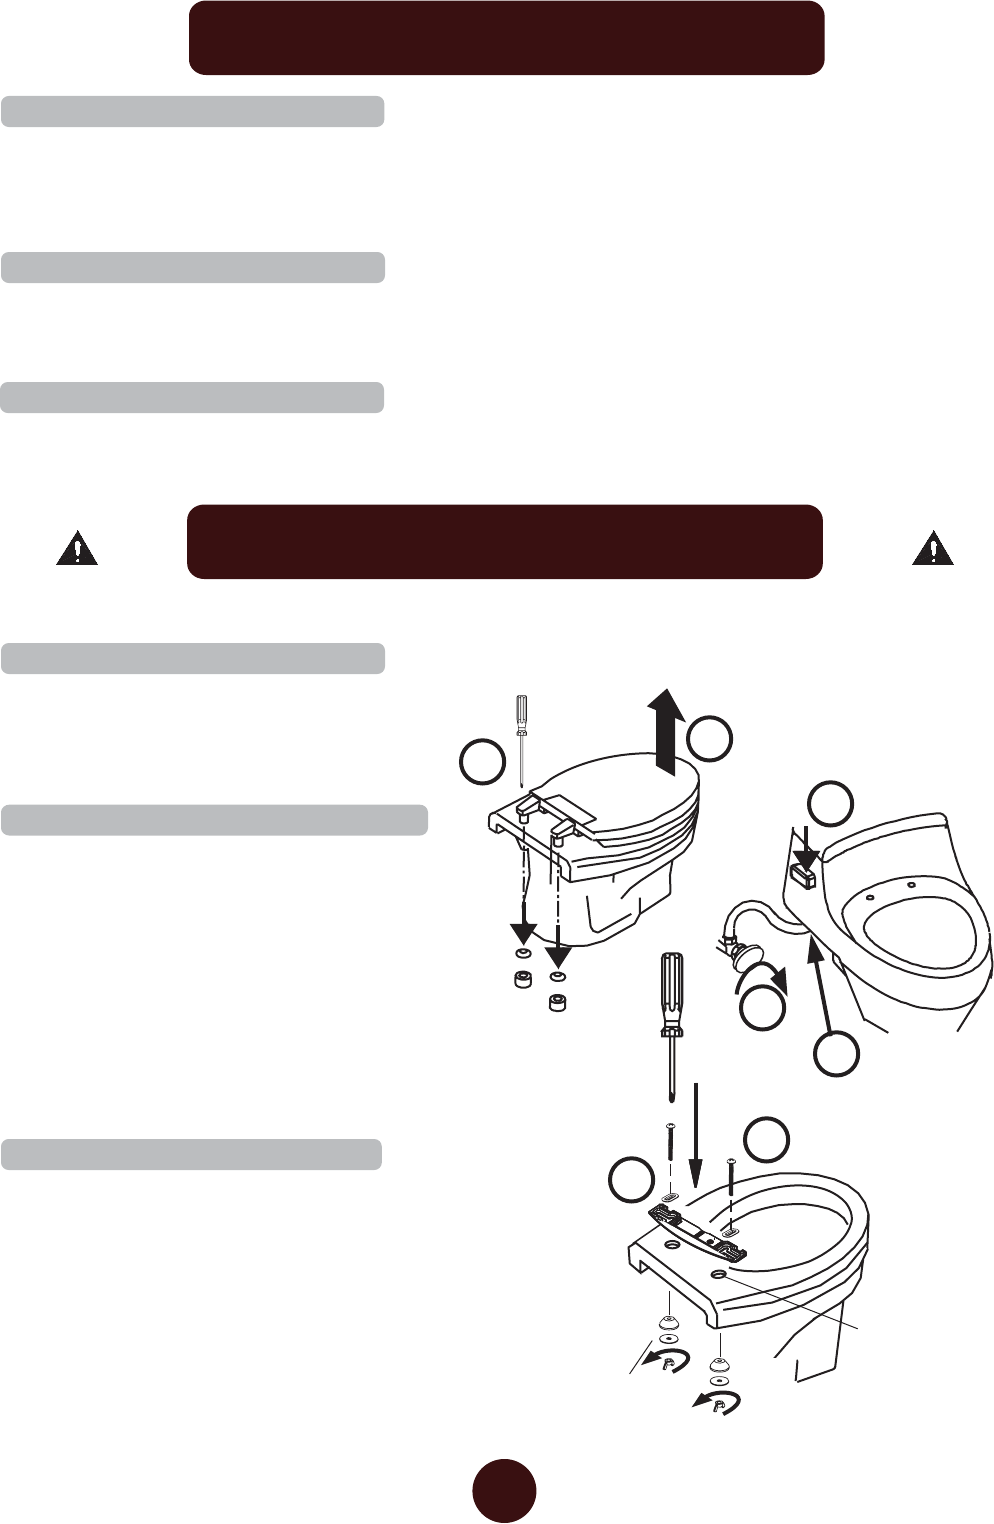
1) Remove Toilet Seat
2) Turn OFF Water and Flush Toilet
Steps may vary by type of seat.
a) Lift hinge covers and use a screwdriver to
remove the mounting bolts.
b) Remove the toilet seat.
You may wish to place a container under the
tank to catch any leaking that could occur
during installation.
a) Turn water valve OFF completely. If the water valve
does not shut OFF completely, STOP. Repair the
water shut-off valve before proceeding.
b) Flush the toilet to empty the tank.
c) Disconnect water supply line from toilet tank.
IMPORTANT: Do not continue without completing these
steps! Failure to do so could result in flooding, leaking, or
damage to the Refresh Personal Hygiene System™.
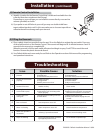
3) Install Mounting Plate
NOTE: These instructions are for Standard Mounting Hardware. See
Alternate Mounting Hardware at the top of this page for further details.
a) Place Mounting Plate over mounting holes, flat side down,
curve toward the back of the toilet.
b) Insert bolts through the Mounting Plate and finger
tighten the wing nuts. Make sure the crush washer and
metal flat washer are put on in the correct order (see
graphic).
Mounting Holes
Crush Washer
Metal Flat Washer
1a
1b
2a
2b
2c
3b
3a
EX93000 Refresh Installation Manual 10/06


