


11
3-1
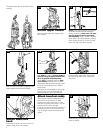
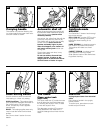
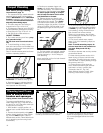
After cleaning
a. Allow carpet or upholstery to dry. To
help prevent matting and resoiling the
carpet, keep children and pets away
from surface until it is completely dry. If
it is necessary to walk on damp car-
pet, place towels or white cloths on the
traffic areas.
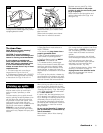
If furniture must be replaced before the
carpet is dry, place plastic or aluminum
foil under legs of furniture so metal
slides or wood finishes will not stain the
carpet.
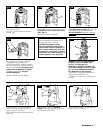
b. Empty tanks, rinse with clear water
and let air dry. Rinse the recovery tank
lid and let air dry.
Any unused detergent may be left in the
detergent container for future use.
3-2
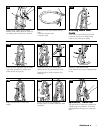
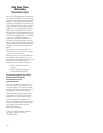
d. Remove lint from filter screen located
on bottom of cleaner as follows.
Note: When brushes seem to be rotat-
ing slowly, disconnect cleaner from
electical outlet and check and clean
this screen.
Remove both tanks as described in Figs.
2-10 & 2-21. Tilt cleaner back so handle
rests on floor.
Squeeze filter frame, lift and pull it out.
Wipe off screen and push frame back
into place.
Return cleaner to upright position.
e. Vacuum thoroughly after carpet has
completely dried. This will help reduce
any shading left by the cleaner’s
brushes.
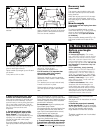
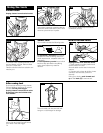
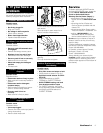
c. Remove lint from filter screen located
inside recovery tank.
Unplug cleaner from electrical outlet.
Remove both tanks as described in Figs.
2-10 & 2-21. With handle in upright posi-
tion, tilt cleaner back so that handle
rests on the floor.
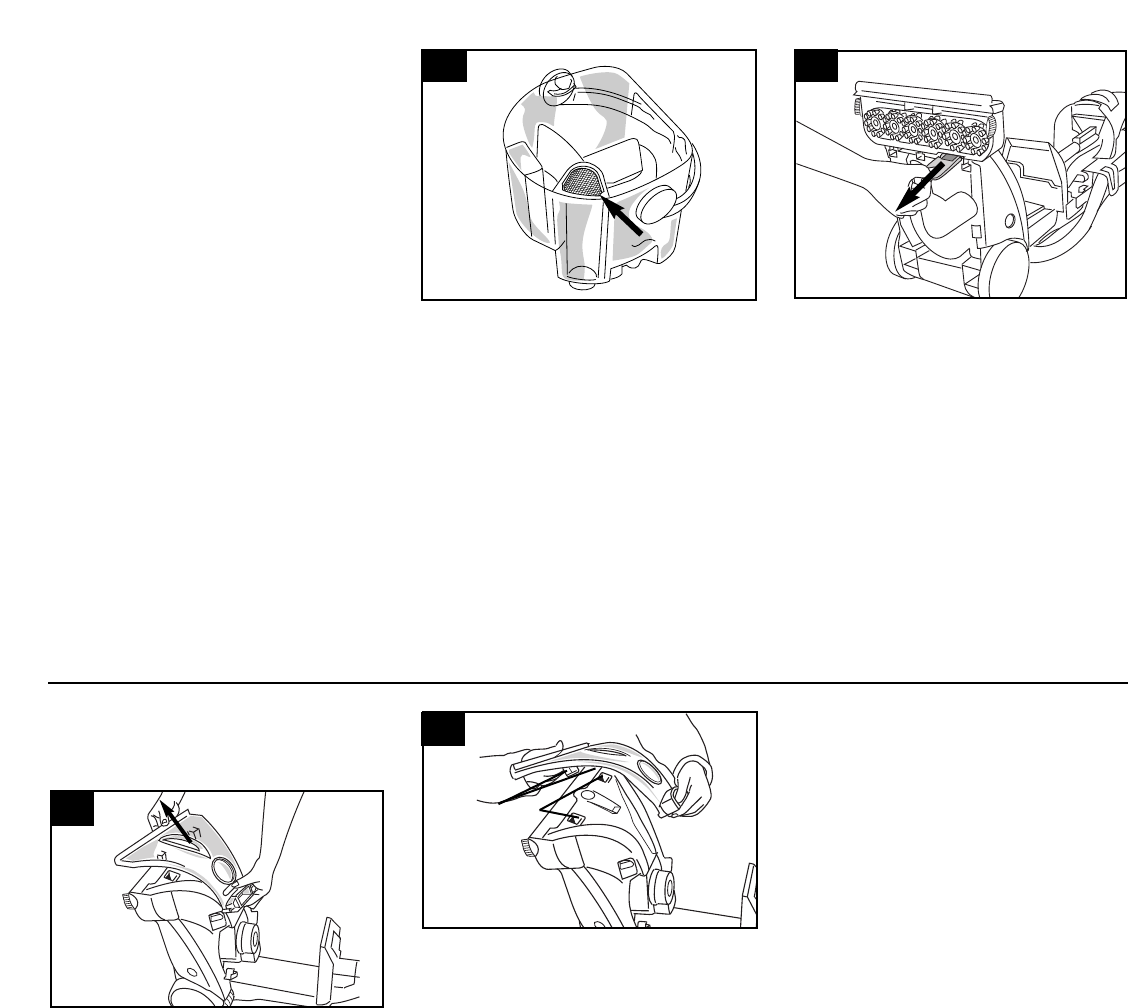
Lift up rear edge of nozzle. Slide nozzle
up and remove from cleaner.
3-3
3-4
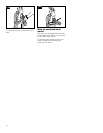
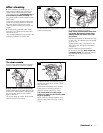
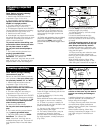
To clean nozzle
If lint or other debris becomes lodged in
nozzle, it can be removed for cleaning.
A
B
To replace nozzle, line up tabs (A) on
nozzle with holes (B) in cleaner. Slide
tabs into holes.
Slide nozzle completely onto cleaner.
Press down on nozzle to secure it.
Replace recovery tank (Fig. 2-22).
The nozzle must be in the proper
position in order for the recovery tank
to go on properly.
Raise cleaner to upright position and
replace clean water tank (Fig. 2-16 to
2-19).
Continued
➜