TL8230A
User Guide
Programmable Thermostat
TL8230A 69-1803 3/5/05 1/2
Honeywell’s TL8230A programmable thermostat can be connected to an
electric heater to control the room temperature.
* Set the switch to Off to cut power to the heater. This will not affect the time and tem-
perature settings.
** The thermostat displays the heater duty cycle required to maintain the desired tem-
perature. For example, appears when the heater is activated 40 percent of the
time.
• To remove the control module from the power
base, loosen the captive screw underneath the
thermostat and pull the two components apart
as shown.
• To install the control module onto the power
base, reverse the above procedure.
NOTE: Always keep the thermostat's vents clean and
unobstructed.
Some thermostat configurations can be
modified via the switches on the back of the
control module.
Default (factory) settings are inside the gray cells.
Upon power-up, the thermostat is in manual mode ( ) and displays the
actual temperature.
n Press the Hour and Min buttons to set the time.
o Press the Day button to set the day.
LO: The measured temperature is below 32°F (0°C).
Heating is activated.
HI: The measured temperature is above 122°F (50°C).
When the backlight button is pressed, the display illuminates for 5 seconds.
When either of the buttons is pressed, the display illuminates for 10 sec-
onds.
Setpoint
The thermostat generally displays the actual temperature. To view the
setpoint, press one of the buttons once or press the backlight button. The
setpoint will appear for the next 5 seconds.
To change the setpoint, press one of the buttons until the desired temper-
ature is displayed. To scroll faster, hold the button.
Preset buttons
The thermostat has 3 temperature preset buttons:
Comfort preset button
Economy preset button
Vacation preset button
To use a preset temperature, press the appropriate button. The corresponding
icon , or will be displayed.
The following table shows the intended use and the default setting of each of
the preset buttons.
To store a preset temperature:
n Set the desired temperature using the buttons.
o Press and hold the appropriate preset button until the corresponding
icon is displayed.
p Press Mode/Ret to exit.
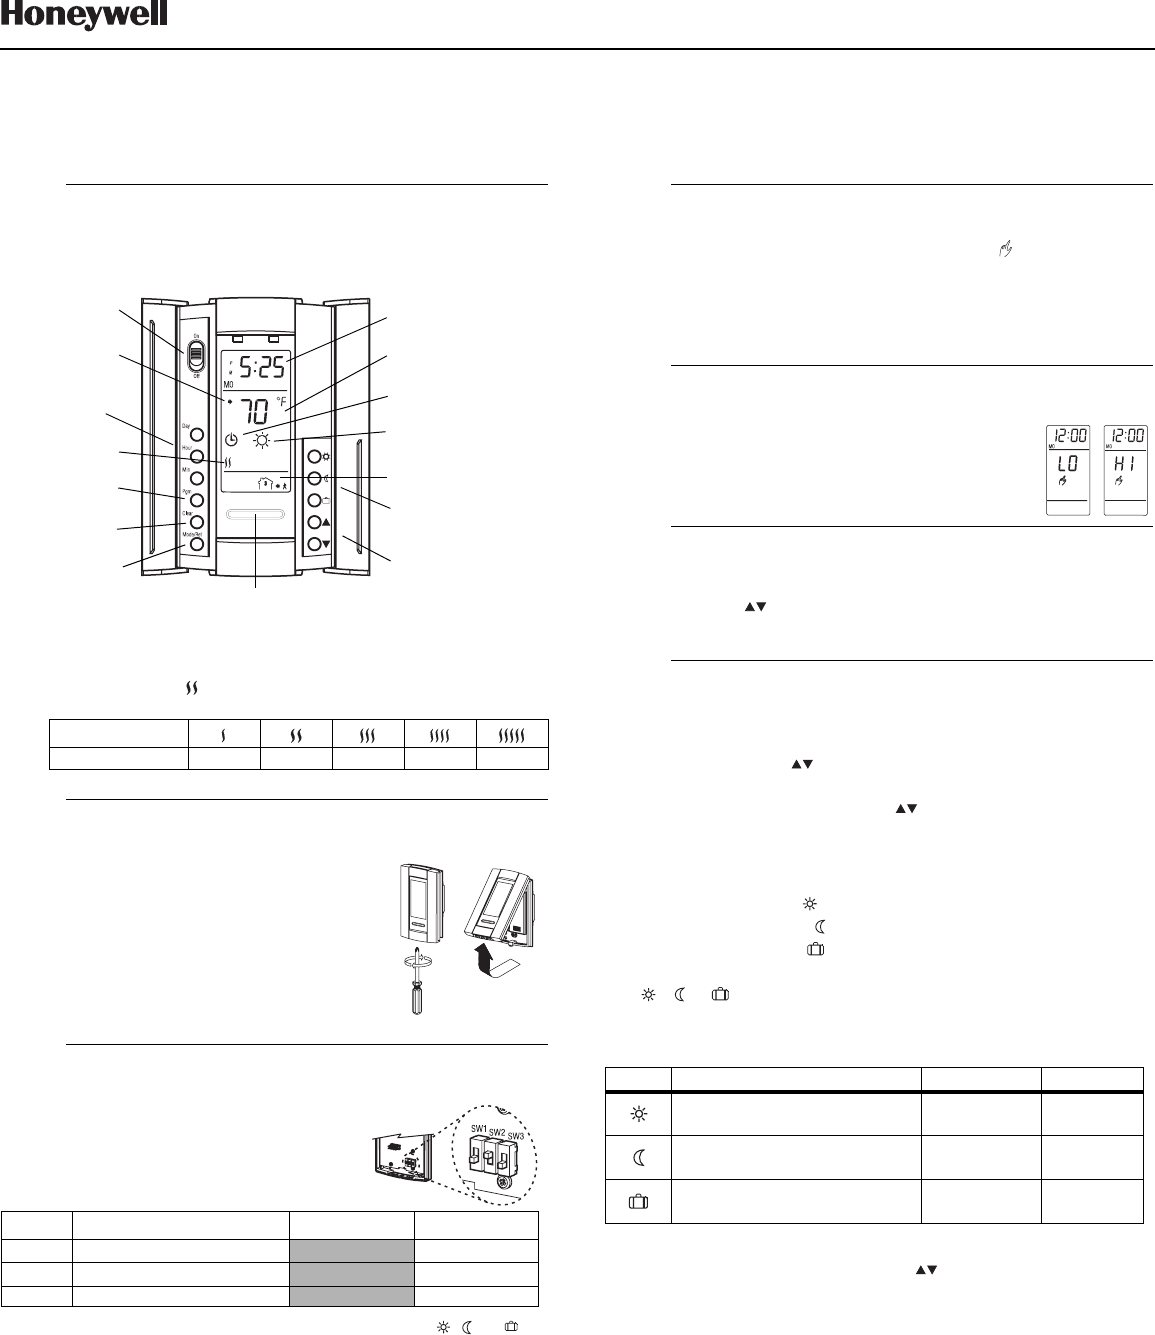
n
Description
1.
Display
% of duty cycle 1 to 24% 25 to 49% 50 to 74% 75 to 99% 100%
o
Assembly/Disassembly
2.
p
Configuration
3.
# Functionality UP DN
SW1
Temperature format
a
a. If you change the temperature display format, the preset buttons ( , and )
will return to their default settings.
°F °C
SW2
Early Start
b
b. Early Start functions in Automatic mode only. When this function is enabled, the
thermostat calculates the optimal time to start heating in order to obtain the desired
temperature by the set time. The thermostat re-assesses the start time daily based
on the previous day’s performance.
Disable Enable
SW3 Time format
12-hour 24-hour
On/Off switch *
Day and time
settings
Temperature
adjustment
buttons
Program button
Mode selection /
program exit
Temperature display
Mode display
Period display
Temperature
preset buttons
Time and day display
Heating power **
Backlight button
Program
clear button
Preset temperature
icon
Appears when
the setpoint is
displayed
q
Power-up
4.
r
Error Messages
5.
s
Backlight
6.
t
Temperature Setting
7.
Icon Intended use Default setting New
Comfort
(when at home)
70°F (21°C)
Economy
(when asleep or away from home)
62°F (16.5°C)
Vacation
(during prolonged absence)
50°F (10°C)


