Heat & Glo • SL-550, SL-750, SL-959 Door Installation Instrucitons • 539-925 Rev. E • 5/11
SL-550, SL-750 and SL-950 Series
OPTIONAL DOOR INSTALLATION INSTRUCTIONS
KITS: DF-550M, DF-750M and DF-950M
Installing the optional door on the Fireplaces
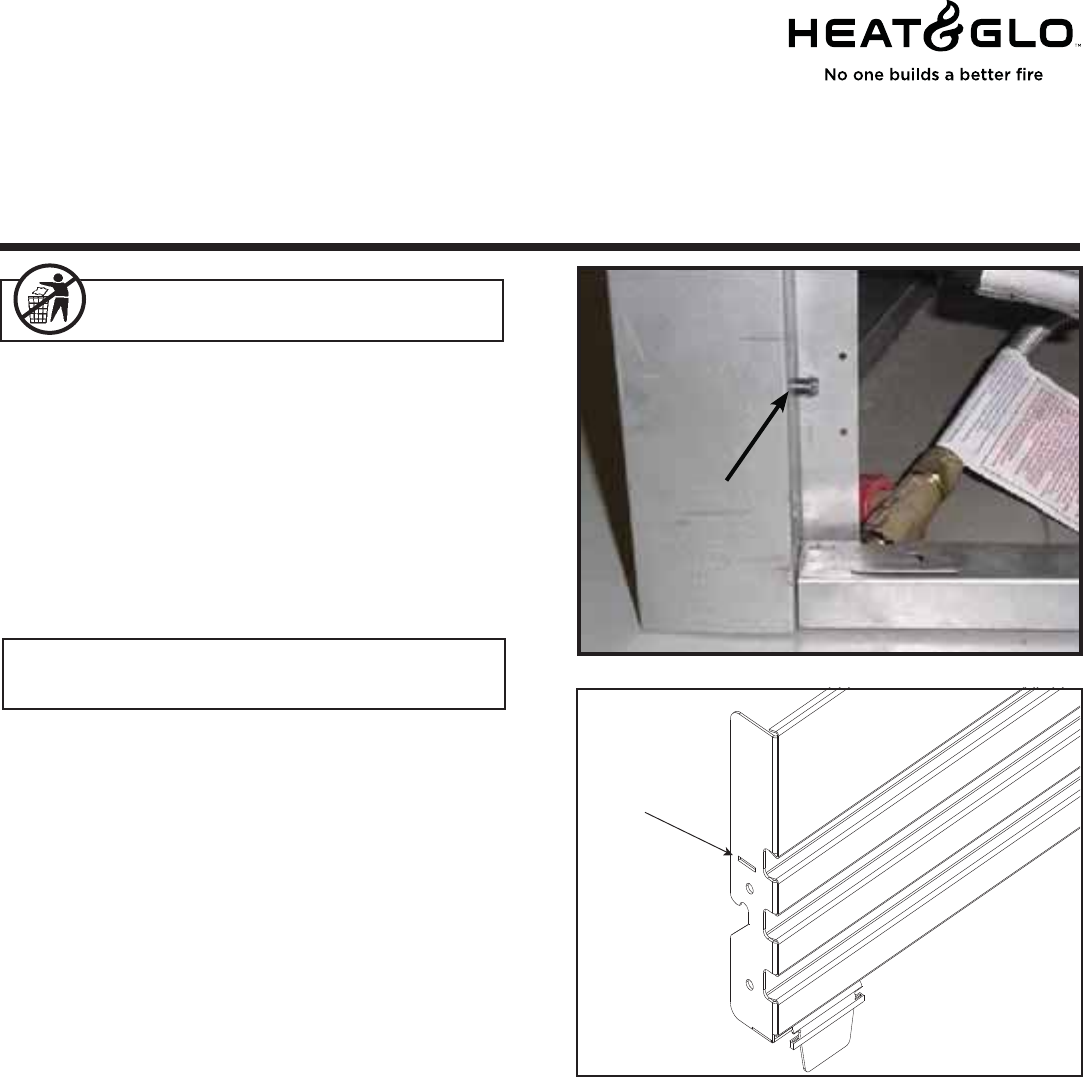
Figure 2
Figure 1
INSTALL
SHOULDER
SCREWS
Step 2. SL-TR/TV Series: Remove the lower louver
assembly by lifting the louver out of the slots
of the fi replace.
Step 3. Cut the top 2 ½” louver off of the lower louver
assembly as shown in Figure 2. Note: Assure
all the sharp burrs are removed after cutting.
Step 4. Reinstall the lower louver assembly.
Step 5. Install the door option.
Step 6. Install the top louver assembly which came
with the optional door.
Note: Install shoulder screws to the side of the unit (see
Figure 1).
Leave this manual with party responsible for use
and operation.
Step 1. SL-TR/TV Series: Remove the top louver as-
sembly, which was originally shipped with the
fi replace, and discard.
SL-TRS Series: Lower louver must be ordered
separately. Proceed to Step 3.
CUT
HERE
Cleaning Instructions for Doors
Use a microfi ber cloth and Windex® Original Glass
Cleaner or 03M003 Stove Bright® Glass Cleaner to clean
the door immediately after installation to remove acids
deposited by the installer or technician. Spray the cleaner
onto the microfi ber cloth and carefully wipe the entire
surface. The door should be cleaned in this manner
annually by the homeowner to remove fi ngerprints or
other contaminants. Once oxidation of the paint pigment
has occurred, cleaning will not restore the original color.
CAUTION! Risk of Cuts or Abrasions. Wear protective
gloves and safety glasses during installation.
Please contact your Heat & Glo dealer with any questions
or concerns.
For the location of your nearest Heat & Glo dealer,
please visit www.heatnglo.com.
Heat & Glo, a brand of Hearth & Home Technologies Inc.
7571 215th Street West, Lakeville, MN 55044
www.heatnglo.com


