


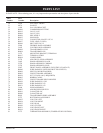
22618-4-1106 Page 37
MAINTENANCE
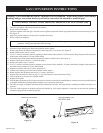
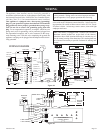
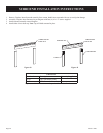
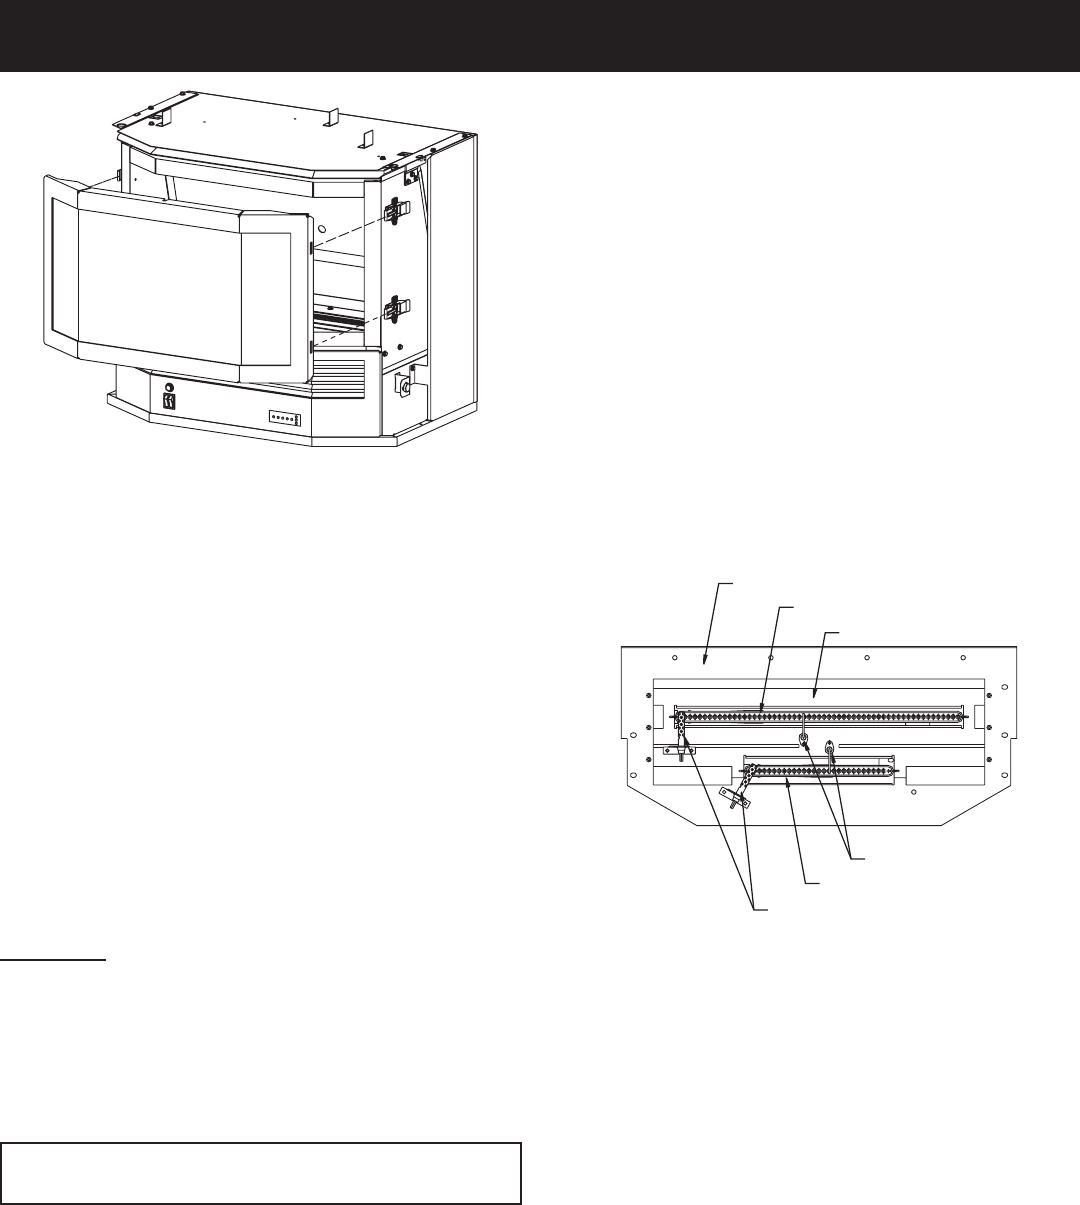
Figure 46
Front door removal drawing
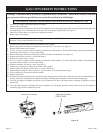
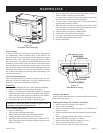
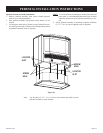
LOG SUPPORT PLATE
BURNER PLA
TE
REAR BURNER
FRONT BURNER
IGNITOR ASSEMBL
Y
FLAME SENSOR
Figure 47
Main Burner Drawing
Cleaning Main Burner
Remove main burner and apply air pressure inside the throat and
ports of the main burner.
Removing HSI Flame Sensor, Blower and Orifice
1. Remove front door assembly. See Figure 46.
2. Remove logs from firebox.
3. Remove installation bracket and gasket from underside of
firebox (1 screw).
4. Disconnect flame sensor and HSI connector from wiring har
-
ness.
5. Remove log support from inside firebox (13 screws).
6. Remove HSI from log support (13 screws).
7. Remove flame sensor from log support (1 screw).
8. Remove burners from firebox (1 screw).
9. Once burners are removed, orifices are exposed.
Glass Cleaning
It will be necessary to clean the glass periodically. During start-
up, condensation, which is normal, forms on the inside of the
glass and causes lint, dust and other airborne particles to cling to
the glass surface. Also, initial paint curing may deposit a slight
film on the glass. It is therefore recommended that the glass be
cleaned two or three times with a non-abrasive household cleaner
and warm water (we recommend gas fireplace glass cleaner) after
the initial burn. We do not recommend using packaged spray type
household glass cleaner. After that, the glass should be cleaned
two or three times during each heating season depending on the
circumstances present.
General Glass Information
Only glass approved for use in Empire Comfort Systems, Inc. fire-
place may be used for replacement. The glass replacement must
be done by a licensed or qualified service person.
WARNING
:
1. The use of substitute glass will void all product warranties.
2. Care must be taken to avoid breakage of the glass.
3. Under no circumstances should this appliance be operated
without the glass front or with a broken glass front. Replace-
ment of the glass (with gasket) as supplied by the manufac-
turer must be done by a qualified service person.
4. Do not abuse the glass by striking or hitting the glass.
WARNING: Do not use abrasive cleaners on glass. Do not
attempt to clean glass when glass is hot.
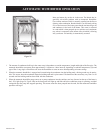
Glass Assembly Replacement
1. Remove cabinet top.
2. Pivot left and right front panels open.
3. Release two door latches on left and right of firebox.
4. Grasp glass frame and carefully pull toward you.
5. Place glass frame assembly on non-abrasive surface. The ex
-
terior of the glass frame assembly should be facing the non-
abbrasive surface.
6. Insert a putty knife between glass and bottom corners on
frame. Carefully separate glass from frame.
7. Use putty knife to remove silicone and gasket material from
frame. Surface of frame must be clean and dry.
8. At each corner of frame apply two (2) three inch beads of
high temperate (orange) silicone.
9. With thin gasket on glass facing silicone on frame, insert
glass into frame. Carefully press the glass onto frame in order
to have contact between glass and silicone.
10. Allow silicone to set-up for an adequate time.
11. Gently place glass frame back into firebox.
12. Close the 2 door latches on left and right of firebox.
13. Pivot left and right front panels closed.
14. Replace cabinet top.