


CopyrightGianniIndustries,Inc.AllRightsReserved.
PublishP-MU-GS705N-30 Ver.C :2007.07.17
2-1
GS-705N Shear Lock Installation Instruction
Specifications
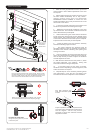
Connecting Diagram
Caution:
Make sure that the "+" and "-"
wire are connected correctly.
Failure to observe polarity will
result in a short circuit and is
not covered by products
warrant.
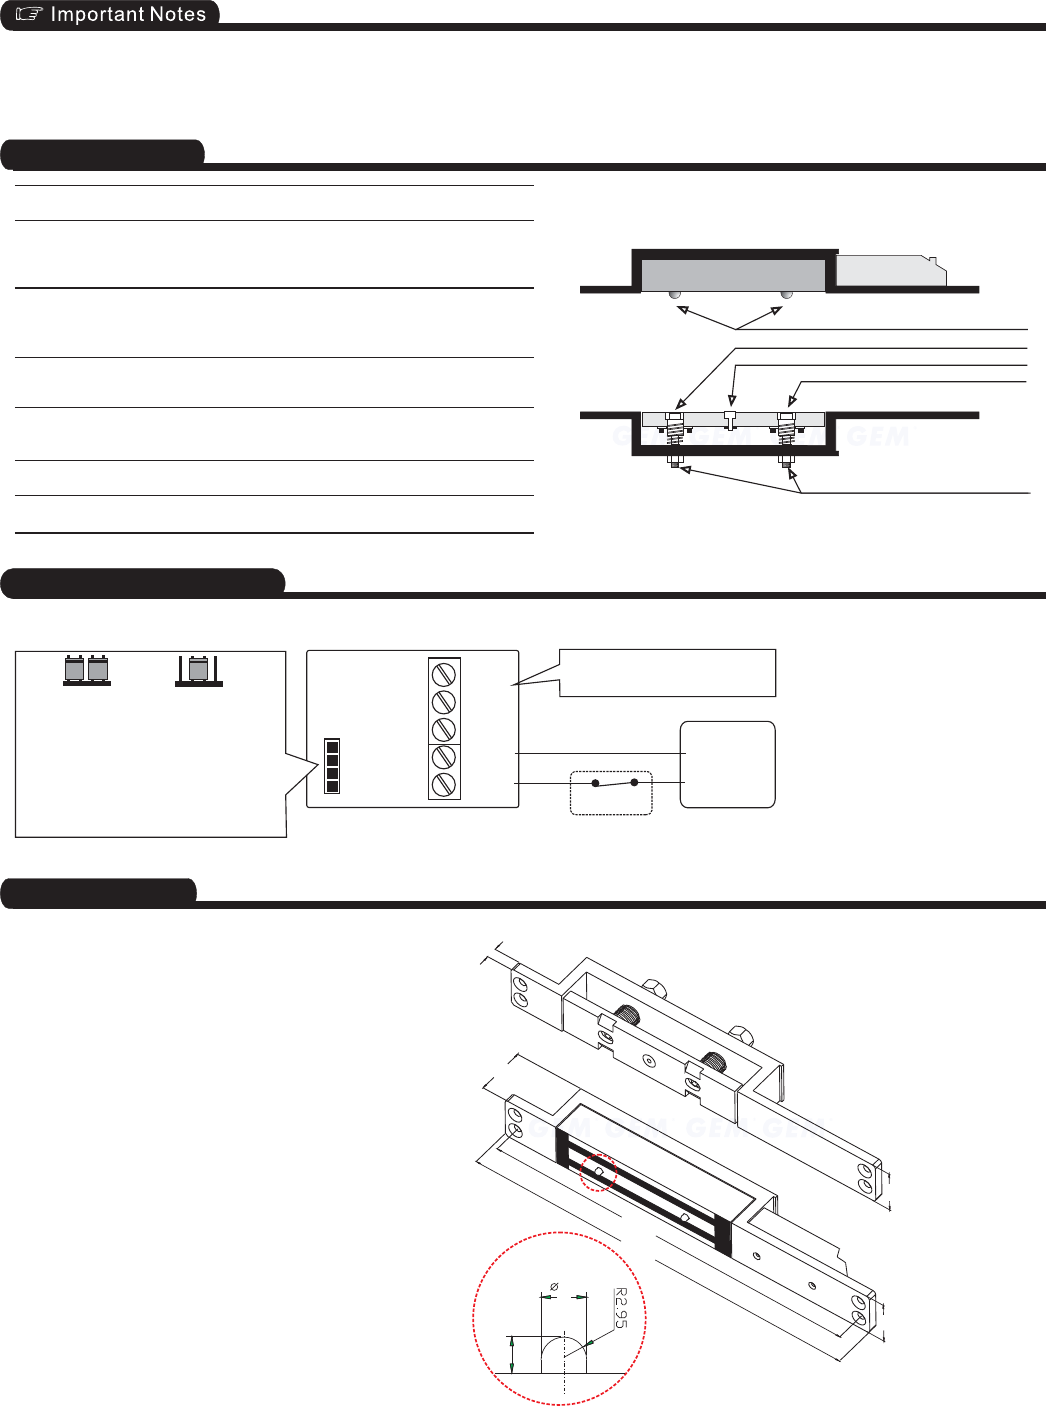
Dimensions
Unit:mm
30
30
32
6
251
267
Push-offbutton
Armaturevertical
adjustmentscrews
LockingBolt
KeepHole
KeepHole
Magnet Assembly
Armature Assembly
GS-705N-30
3.5
5.9
LockingBolt
+
-
Power
supply
Magnet bond sensor output
SPDT relay : 1A@30 VDC
+
-
N.O.
COM.
N.C.
Power
Input
Magnetbond
sensoroutput
Voltage Selection jumpers
Check jumper settings before
connecting the lock to 24 VDC
input power. Damage to the
lock may result from incorrect
jumpersettings.
12Vdc
24Vdc
Holding Force
Power Input
Door Gap
Operating Temper.
Current Draw
Monitoring Output
Finish
Up to 2700 lbs(1226 Kg)in shear.
12/24 VDC selectable via jumpers +10%
over voltage is acceptable , under voltage
will reduce holding force.
0.35A@12 VDC; 0.17A@24 VDC The unit
does not require initial voltage increase to
operate.
Magnet and Armature: Zinc plated
Housing: Black powder coated
SPDT rating
1AMP@30 VDC
2mm
-30C to +50C
Magnet bond sensor output,
Unbalanced air conditioning (stack pressure) can hinder door alignment and must be corrected to help insure positive locking. It
is important to note that the Shear Locks need a regulated 12V DC (or 24VDC) at the lock, and use the highest quality door closer
only. Positive centering door closers are required for all double acting door applicators to help attain consistent dead center
alignment. Alsothe doorlatching problemsmust becorrected priorto installation.
Control Device
N.C. contact orAccess Relay
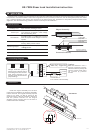
Install the magnet assembly into the door
frame before installation the armature assembly
into the door leaf. The magnet assembly requires
space to run wires, as wall as space for the
recesses portion of the unit. However, make sure
that the position selected for the magnet
assembly leaves enough room on the door to
install the armature assembly.