


Installation Instructions
FAUCET ASSEMBLY
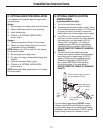
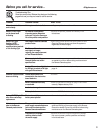
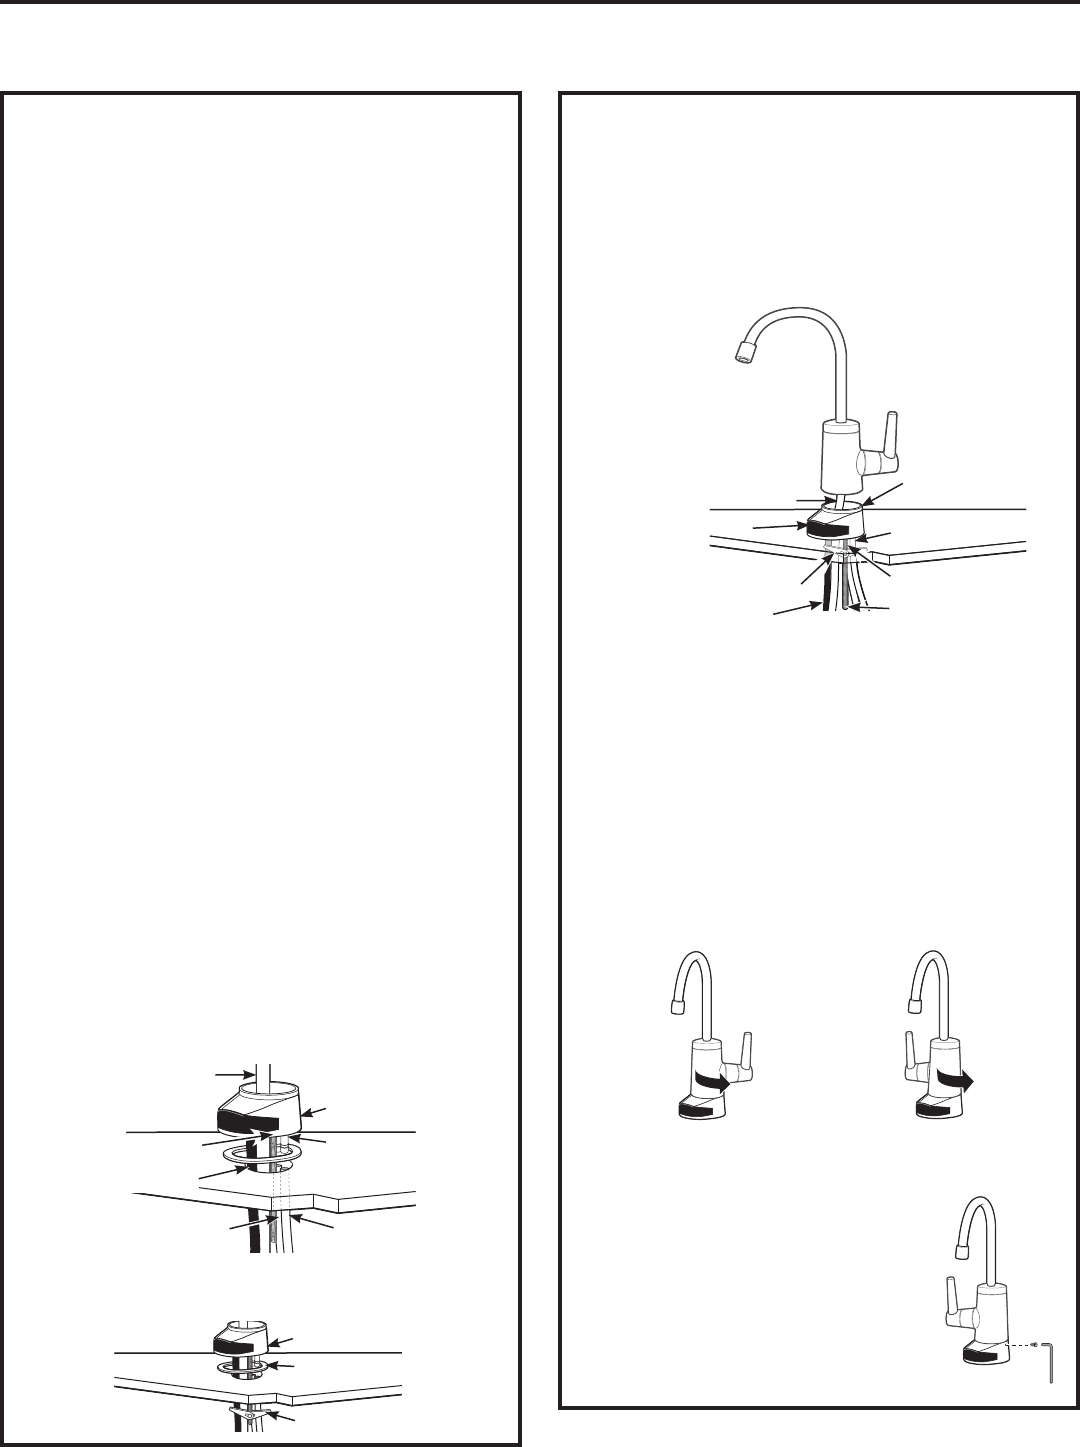
INSTALL THE FAUCET (CONT.)
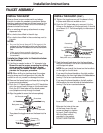
5. Tighten the toggle screw until the base is firmly
in place and does not wobble or turn.
6. Push the 3/8” blue tube up to connect it to the
fitting on the bottom of the faucet body. It should
go in about 3/4”. Pull tube slightly to make sure it
is secure.
7. Push the faucet body down into the faucet base
and turn the faucet 1/8 of a turn counterclockwise
until it stops into place.
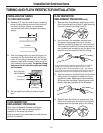
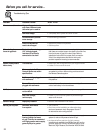
NOTE: You can install the faucet so the handle is
on the right or the left side.
If you want the faucet handle on the right, position
the handle on the front-right side of the base before
turning 1/8 of a turn counterclockwise.
If you want the faucet handle on the left, position
the handle on the rear-left side of the base before
turning 1/8 of a turn counterclockwise.
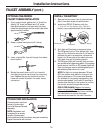
8.Locate the hole at the rear
of the base. Insert the set
screw and begin to tighten
by hand. Finish tightening
with the Allen wrench
provided in the packet.
DO NOT OVER TIGHTEN.
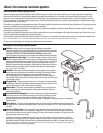
Faucet body
Faucet base
Sink
Gasket
Toggle screw
3/8” Black tube
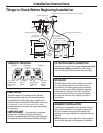
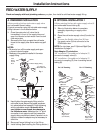
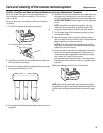
INSTALL THE FAUCET
Be sure there is room underneath and above
the sink to make the needed connections. Before
starting, make sure there is sufficient room for the
faucet base and unit. Select one of the following
places to install the faucet:
A. In an existing sink spray attachment or soap
dispenser hole.
B. In a hole to be drilled in the sink top.
C. In a hole to be drilled in the countertop, next to
the sink.
NOTES:
%HVXUHWKHIDXFHWEDVHZLOOILWIODWDJDLQVWWKH
surface at the selected location so the bottom
gasket between the base and surface area will
seal.
0DNHVXUHWROHDYHHQRXJKFOHDUDQFH
at the back of the faucet in case you need
to remove it.
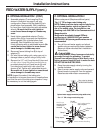
Installation Steps (refer to illustration below
for clarification)
1. If drilling is needed, make a 1
1
ø2” diameter hole.
Be sure to use the proper procedure for drilling
stone, porcelain or stainless steel. Special
drill bits may be needed. Consult a qualified
plumber for the proper procedure.
NOTE: When drilling in stainless steel, the edges
may be sharp and could puncture the tube. Be
careful to not cut yourself or damage the tube.
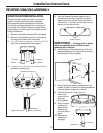
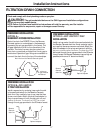
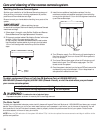
2. Remove the faucet body and base by turning the
base counterclockwise.
3. Push the 1/4” black tube and the 3/8” black tube
onto the correct barb fittings on the faucet base.
Push the 3/8” blue tube and the black power
cord (telephone wire) through the base.
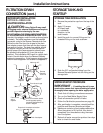
4. Align the gasket to cover the hole completely.
Then place the toggle screw on the base into the
hole.
Faucet base
Sink
Gasket
Toggle screw
1/4” Black tube
Faucet base
1/4” Barb fitting
1/4” Black tube
3/8” Barb fitting
3/8” Black tube
3/8” Blue tube
3/8” Blue tube
Mounting screw
Faucet Faucet
Faucet handle on the RIGHT Faucet handle on the LEFT
15
Black power cord
Black power cord