


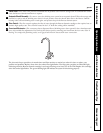

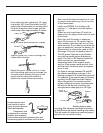
Installation Instructions
REVERSE OSMOSIS ASSEMBLY
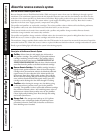
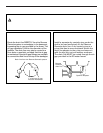
MOUNTING SYSTEM
INSTALLATION
Choose a location under the sink to mount
the system. Location should be easily
accessible, with adequate clearance between
the bottom of the filter cartridges and the
floor or bottom of the cabinet for removal
of filter cartridges. Allow enough space on
either side of the system for the tubing
connections.
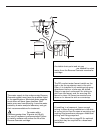
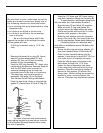
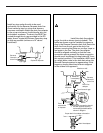
1. Remove the prefilter and postfilter
cartridges.
2. Remove the assembly cover by unlocking
the four tabs on the cover from the system.
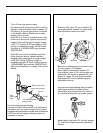
3. Use a flat-head screwdriver to work from
left to right from the underside of the
system.
4. Use the icons on the bottom of the
system for screwdriver positioning.
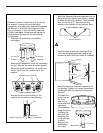
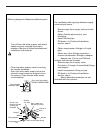
5. Hold the Reverse Osmosis assembly up to
the wall surface where you wish to install
it. Mark location for screws. There should
be a minimum of 17 inches from the
marks to the bottom of the cabinet floor.
CAUTION: Do not get dirt or
debris inside the assembly area. Use only to
mark mounting hole locations.
6. Install screws to the wall, leaving a 3/16-
inch clearance between the head of the
screw and wall (drill pilot holes if needed).
7. Hang the Reverse Osmosis assembly on
the screws. Tighten or loosen the screws
as desired until the system is secure on
the wall.
8. To install the
cover, line up
the front
tabs on the
cover with the
openings
in the system.
9. Snap the cover
in place; the
tabs will flex,
allowing the
cover to snap
in place.
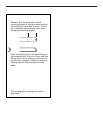
10.Remove the
membrane
cartridge.
Screw locations
17 inches
7 inches
Screws
Screw
3/16″
Wall
Screwdriver positioning
ScrewdriverSystem opening
Tab
Prefilter
Postfilter
To removeTo remove
To remove
Membrane
8