


Installation Instructions
11
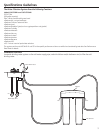
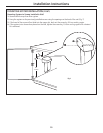
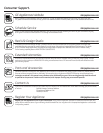
INSTALLING THE TUBING
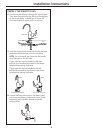
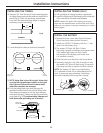
1. Measure 3/4″ from the end of each remaining piece
of tubing (faucet end and inlet end) and mark with a
pencil (Fig. 8). (Check for roundness, smoothness,
cuts, nicks, flat spots and sharp edges. It may be
necessary to recut the tubing.)
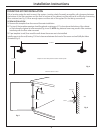
2. Locate fittings for tubing on bottom of manifold.
3. NOTE: Water flow is from left to right. Water inlet
is on the left side and water outlet is on the right
side. Failure to follow will result in water leaks
when filter canisters are removed.
4. Push the tubing firmly into each fitting on the
manifold until the line is flush with the fitting collar.
(If the tubing is removed, re-cut the end, measure,
mark and re-insert). Tubing must be fully inserted to
avoid leaks (Fig. 9). (To remove tubing, depress and
hold white collet; pull tubing out to remove.)
3/4″
(19 mm)
Fig. 8
INCORRECT
INLETOUTLET
Inlet from
supply valve
Outlet
to faucet
3
4
"
Engagement
3/4″(3/8″ tubing)
White Collet
(DO NOT REMOVE)
Insertion line
Insert tubing
Fig. 9
INSTALLING THE TUBING (CONT.)
5. Pull out slightly on tubing to ensure a good seal.
6. Install the other end of the tubing from the inlet side
of the manifold to the feed water adapter.
NOTE: Inspect the ends of the tubing to be sure
there are no imperfections and that the end of the
tubing is cut square. It may be necessary to cut the
tubing again.
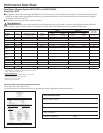
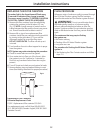
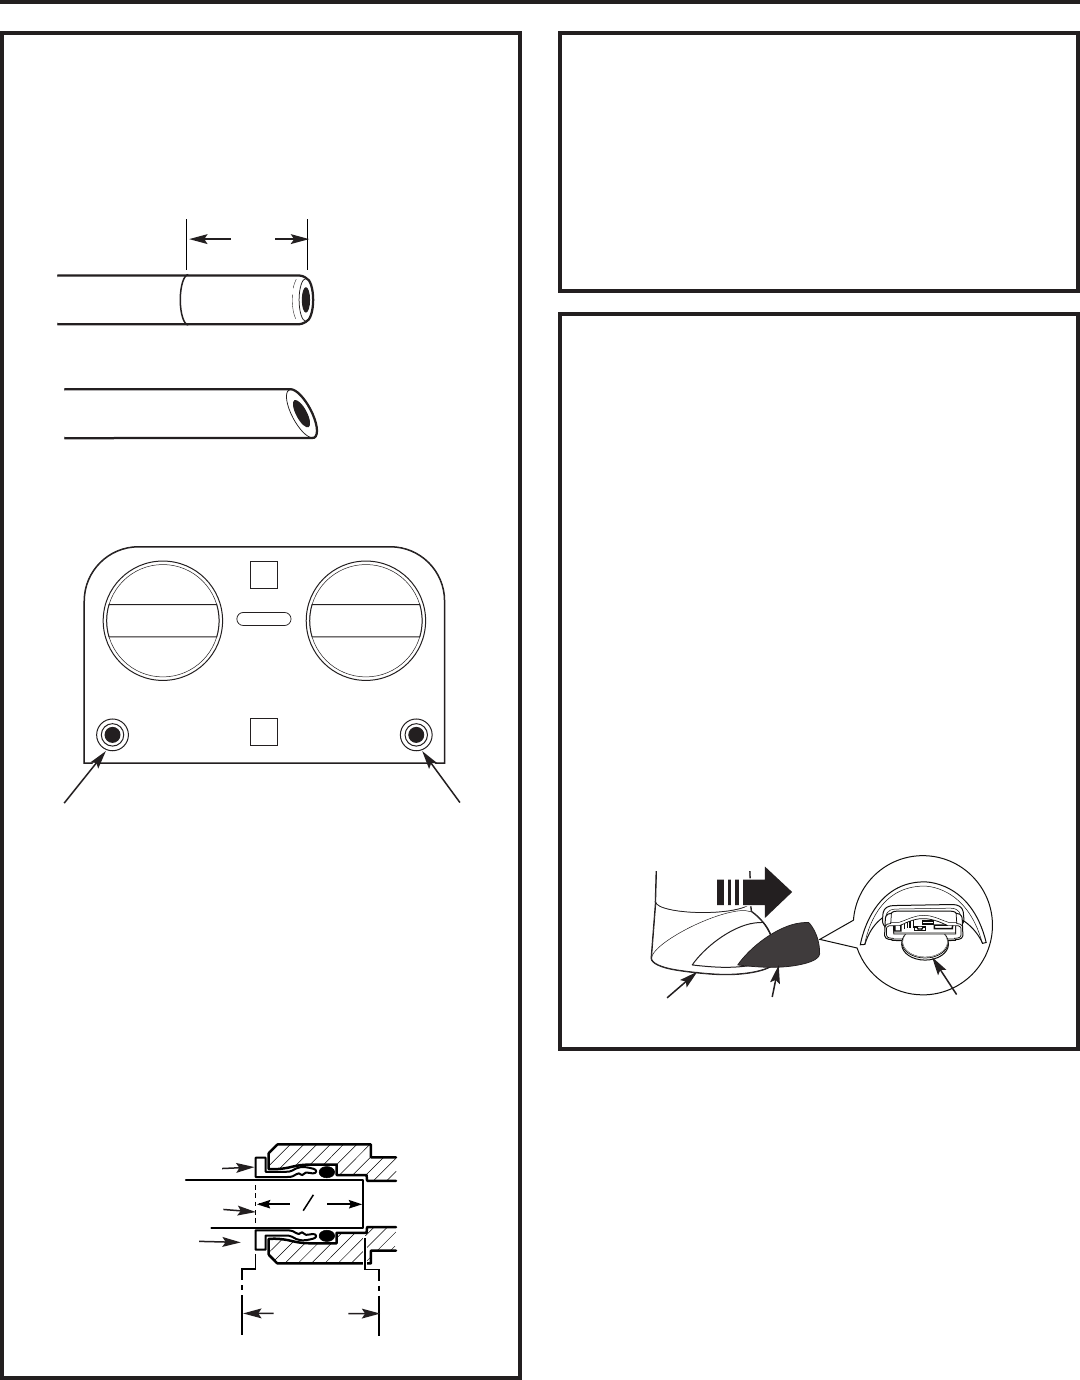
INSTALL THE BATTERY
1. Remove the lens cover from the faucet base.
Grip it from both sides and pull forward.
2. Install one CR2032 3V battery with the “+” side
down into the battery tray.
3. The amber LED light will flash 5 times,
indicating a proper installation and system reset.
If the amber light does not flash, check
the position of the battery and make sure
it is installed correctly.
4. Slide the lens cover back into the faucet base.
5. Normally, the light is off. After 6 months of use,
the amber LED light will flash every 30 seconds,
indicating the time to replace the filter canister.
NOTE: The amber LED light may stop blinking
if it is allowed to blink for an extended period of
time. To ensure proper operation, the battery
should be replaced with every filter change.
Faucet Base
Lens Cover
Battery “+” Side Down