


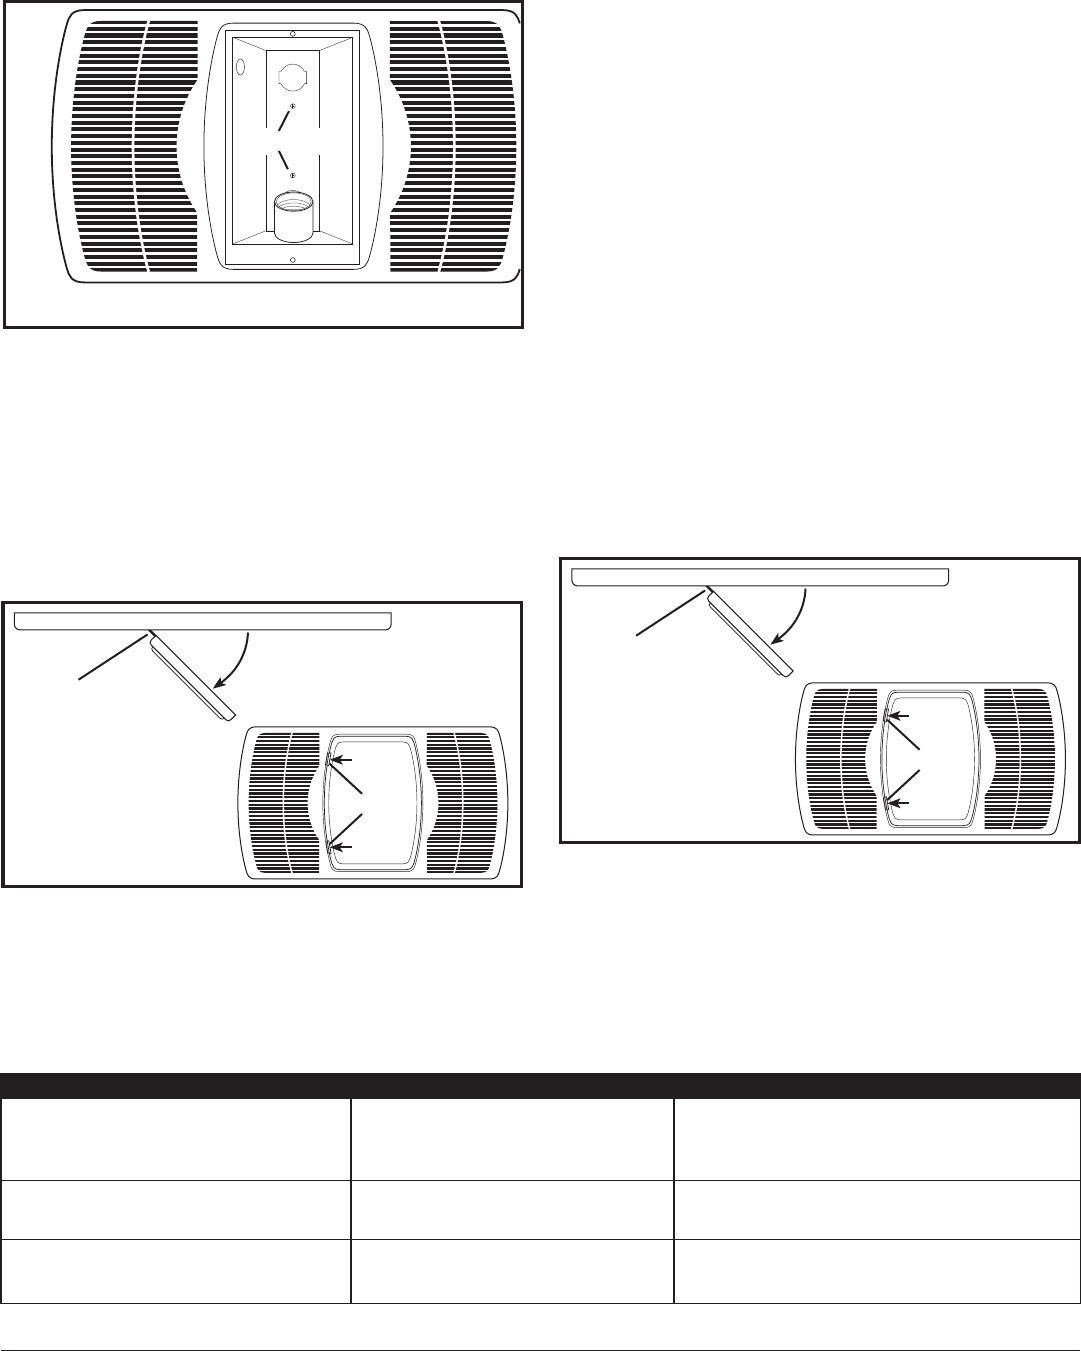
Troubleshooting Guide
Trouble Probable Cause Suggested Remedy
1. Fan does not operate when the switch is on. 1a. A fuse may be blown or a circuit tripped. 1a. Replace fuse or reset circuit breaker.
1b. Connector plug from motor is not plugged in. 1b. Turn off power to unit. Remove Grill and plug motor into
receptacle in housing. Restore power to unit.
1c. Wiring is not connected properly. 1c. Turn off power to unit. Check that all wires are connected.
2. Fan is operating, but air moves slower than normal. 2. Obstruction in the exhaust ducting. 2. Check for any obstructions in the ducting. The most common
are bird nests in the roof cap or wall cap where the fan
exhausts to the outside.
3. Fan is operating louder than normal. 3a. Motor is loose. 3a. Turn off power to unit. Remove grill and check that all screws
are fully tightened. Restore power to unit.
3b. Fan blade is hitting housing of unit. 3b. Call your dealer for service.
210572111 Rev. B 5-06
SECTION 7
Use and Care
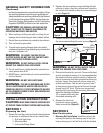
CAUTION: MAKE SURE POWER IS SWITCHED
OFF AT SERVICE PANEL BEFORE SERVICING THE UNIT.
1. Cleaning the Grill: Reverse the instructions in Section
6
Completing the Installation
to remove grill. Use a
mild detergent, such as dishwashing liquid, and dry
with a soft cloth. NEVER USE ANY ABRASIVE PADS
OR SCOURING POWDERS. Completely dry grill before
reinstalling. Refer to instructions in Section 6
Completing the Installation
, to reinstall grill.
2. Cleaning the Fan Assembly: Wipe all parts with a
dry cloth or gently vacuum the fan. NEVER IMMERSE
ELECTRICAL PARTS IN WATER.
CAUTION: ALLOW BULBS TO COOL BEFORE
REPLACING.
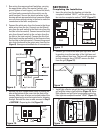
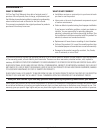
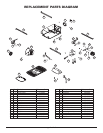
3. Changing the Light Bulb: Disconnect power to the
unit. Open light lens by pushing in on the two tabs
of light lens and pulling outward from lens. The lens
will swing open on the connector bars. DO NOT
remove the lens from the grill (Figure 16).
4. Unscrew bulb from lamp holder and replace with a
100 watt maximum, type A19 medium base
incandescent bulb.
5 of 8
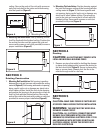
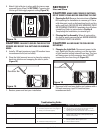
4. Attach light reflector in place with the two screws
removed during
Step 2
in SECTION 1
Preparing the
Unit
so grill fits snuggly against ceiling (Figure 14).
CAUTION: FAILURE TO SECURE THE REFLECTOR
SCREWS MAY RESULT IN A RATTLING OR HUMMING
NOISE.
5. Install a 100 watt maximum, type A19 medium base
incandescent bulb (not included).
6. Close the light lens and secure in place by swinging
back into position and snapping the tabs in place
(Figure 15).
7. Restore power and test your installation.
Figure 14
Screws
Figure 15
Tabs
Connector Bar
Figure 16
Tabs
Connector Bar
www.geelectrical.com