


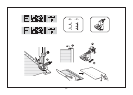
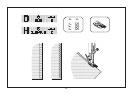
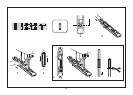
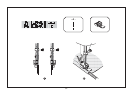
Mueva el control del alimentador hacia la
derecha para bajar los dientes de alimentación.
(1)
Cambie el pié prensatela por el pié de pegar
botones.
Posicione la tela debajo del pié. Coloque el
botón en la posición deseada y baje el pié.
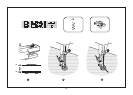
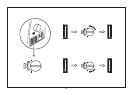
Seleccione la costura Zig zag con el dial
selector. Ajuste el anchura del punto Zig Zag
de "3" a "7" de acuerdo a la separación entre
los agujeros del botón. Gire el volante para
confirmar que la aguja entra limpiamenteen los
agujeros del botón. Seleccione la costura recta
con el dial selectos y cosa unas puntadas de
seguridad. Seleccione la costura Zig zag con
el dial selector y lentamente cosa el botón con
aproximadamente diez puntadas. Seleccione
la costura recta mediante el dial selector y
cosa algunas puntadas de seguridad (2).
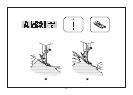
Si se requiere un cuello debajo del botón,
coloque una aguja gruesa arriba del botón y
cosa (3). Para coser botones de 4 agujeros,
cosa primero los dos agujeros de frente (2),
empuje la tela hacia adelante y cosa los dos
agujeros de atrás (3).
Move the drop feed control to right side to
lower the feed dogs. (1)
Change presser foot to button sewing foot.
Position the work under the foot. Place the
button in the desired position, lower the foot.
Set the pattern selector knob on zig zag stitch.
Adjust the stitch width between "3" - "7"
according to the distance between the two
holes of the button. Turn the handwheel to
check that the needle goes cleanly into the left
and right holes of the button. Set the pattern
selector knob on straight stitch, and sew a few
securing stitches. Set the pattern selector knob
on zig zag stitch, and slowly sew on the button
with about 10 stitches. Set the pattern selector
knob on straight stitch, and sew a few securing
stitches.
If a shank is required, place a darning needle
on top of the button and sew. (3) For buttons
with 4 holes, sew through the front two holes
first (2), push work forward and then sew
through the back two holes. (3)
Sewing on buttons
Coser botones
Pose des boutons
GB
E
F
57
Déplacez le levier d'entraînement vers la droite,
pour abaisser les griffes. (1)
Mettez en place le pied bouton.
Placez l'ouvrage sous le pied. Positionnez le
bouton à l'endroit désiré et abaissez le pied
presseur.
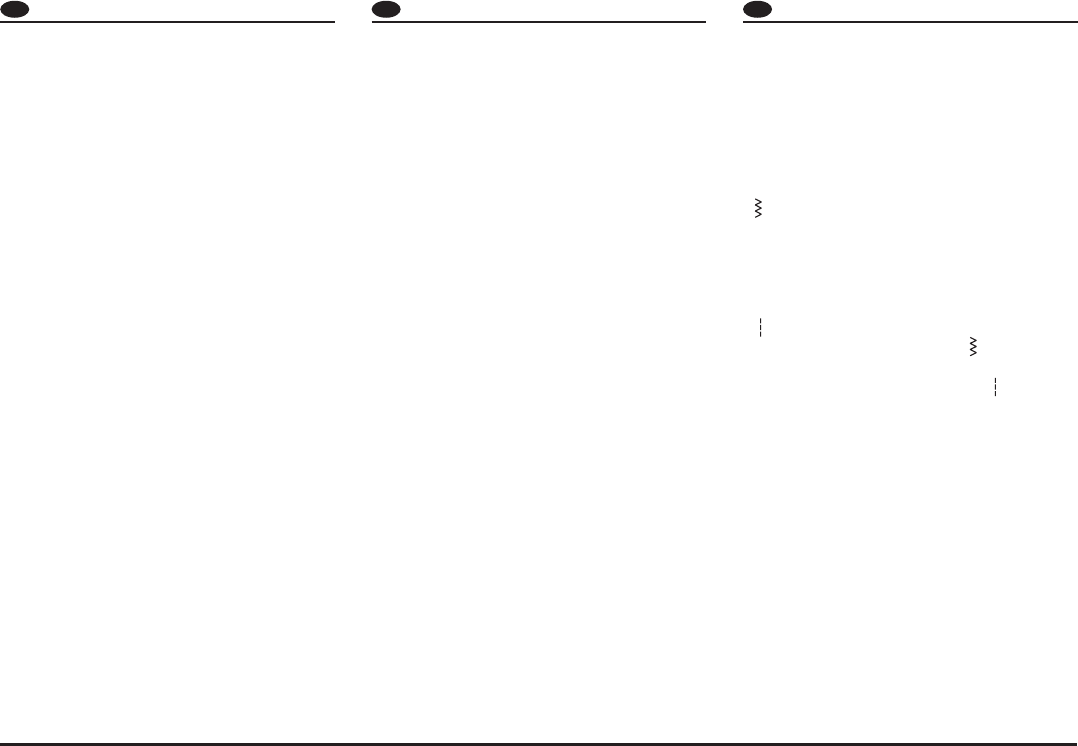
Réglez le sélecteur de motif en position zigzag
" " et réglez la largeur de points entre "3" et
"7" selon l'écartement des trous du bouton.
Tournez le volant pour vous assurer que
l'aiguille traverse librement les trous gauche et
droit du bouton.
En plaçant le sélecteur de points sur la position
" ", piquez quelques points d'arrêt, puis
replacez le sélecteur sur " " et piquez
lentement une dizaine de points.
Replacez le sélecteur en position " " et piquez
quelques points d'arrêt (2).
Si vous souhaitez coudre un bouton à queue,
placez une aiguille à repriser au dessus du
bouton avant de le coudre sur l'ouvrage (3).
Pour coudre un bouton à 4 trous, piquez tout
d'abord les deux premiers trous (2), puis
déplacez votre ouvrage pour piquer les deux
autres trous (3).