SAVE THESE INSTRUCTIONS
Grounding Instructions
This appliance must be grounded. If it should malfunction or break down, grounding provides a path of least resistance for
electric current to reduce the risk of electric shock. This appliance is equipped with a cord having an equipment-grounding
conductor and grounding plug. The plug must be plugged into an appropriate outlet that is properly installed and grounded
in accordance with all local codes and ordinances.
DANGER
Improper connection of an equipment-grounding conductor can result in risk
of electric shock. Check with a qualified electrician or service person if you are
in doubt as to whether the outlet is properly grounded. Do not modify the plug
provided with the appliance. If it will not fit the outlet, have a proper outlet
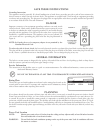
installed by a qualified technician. This appliance is for use on a nominal 120
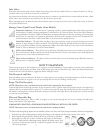
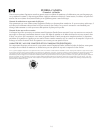
volt circuit and has a grounding plug that looks like the plug illustrated in
Figure A.
NOTE: In Canada, the use of a temporary adapter is not permitted by the
Canadian Electrical Code.
To reduce the risk of electric shock, the hose with electrical wires has a polarized plug (one blade is wider than the other).
This plug will fit in a polarized outlet only one way. If the plug does not fit fully in the outlet, reverse the plug. If it still does
not fit, contact a qualified electrician to install the proper outlet. Do not change the plug in any way.
GENERAL INFORMATION
The built-in vacuum system is designed for dry pick up of household dirt and dust. Avoid picking up hard or sharp objects
with the system to prevent hose and plastic pipe damage or clogs.
Service Information
The instructions in this booklet serve as a guide to routine maintenance. For additional information, contact your nearest
Authorized Warranty Station.
DO NOT OIL THE MOTOR AT ANY TIME. IT IS PERMANENTLY LUBRICATED AND SEALED.
Rating Plate
The model, type and serial numbers are indicated on the rating plate located on the
control panel or motor hood. For prompt and complete service information, always
refer to these numbers when inquiring about service.
PLANNING
If your home already has the system of plastic pipes and inlet valves, you are ready to install the power unit (refer to Install
Power Unit section below). If not, you can contract to have the system installed by a professional or you may choose to do-
it-yourself. If you plan to install the system yourself, it is important to carefully plan the location of each inlet valve, the
power unit, and the network of plastic pipes. This booklet only deals with the installation of the power unit; “How-To” book-
lets are generally included with installation kits. Careful planning will help you determine the installation kits to buy. The
kits should contain enough plastic pipe and fittings, and inlet valves for your needs. Check with your dealer if you have any
questions.
Power Unit Location
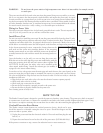
NOTE: Mount power unit at least 12 inches from the ceiling and any adjacent wall, at least 28 inches from the
floor and within 6ft. of an electrical outlet.
WARNING: Do not block the hood ventilation openings on the top of the power unit. Lack of ventilation will cause
the motor to overheat.
FIGURE A
3
CV3120D


