


Page 13
12409-2-0403
LOG PLACEMENT
LOG PLACEMENT(Figures 12, 13, 14 and 15)
SO Logs
Before you begin: This unit is supplied with a set of ceramic fiber
logs. Do not handle these logs with your bare hands! Always wear
gloves to prevent skin irritation from ceramic fibers. After handling
logs, wash your hands gently with soap and water to remove any
traces of fibers.
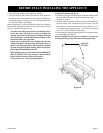
All Logs
The log system has a rear log support that rests under the rear log.
This support has two holes per side that fits on the single pin
covering the air shutter. A label on the rear log support indicates
the location of the holes to be used. (See label).
Every burner is shipped with a protective cover. This cover must
be removed before log placement.
The positioning of the logs is critical to the safe and clean operation
of this heater. Sooting and other problems may result if the logs
are not properly and firmly positioned in the appliance.
Refer to Figures 12, 13, 14 and 15 for the following warning.
Warning: Failure to position the parts in accordance with
this diagram or failure to use only parts specifically approved
with this appliance may result in property damage or personal
injury.
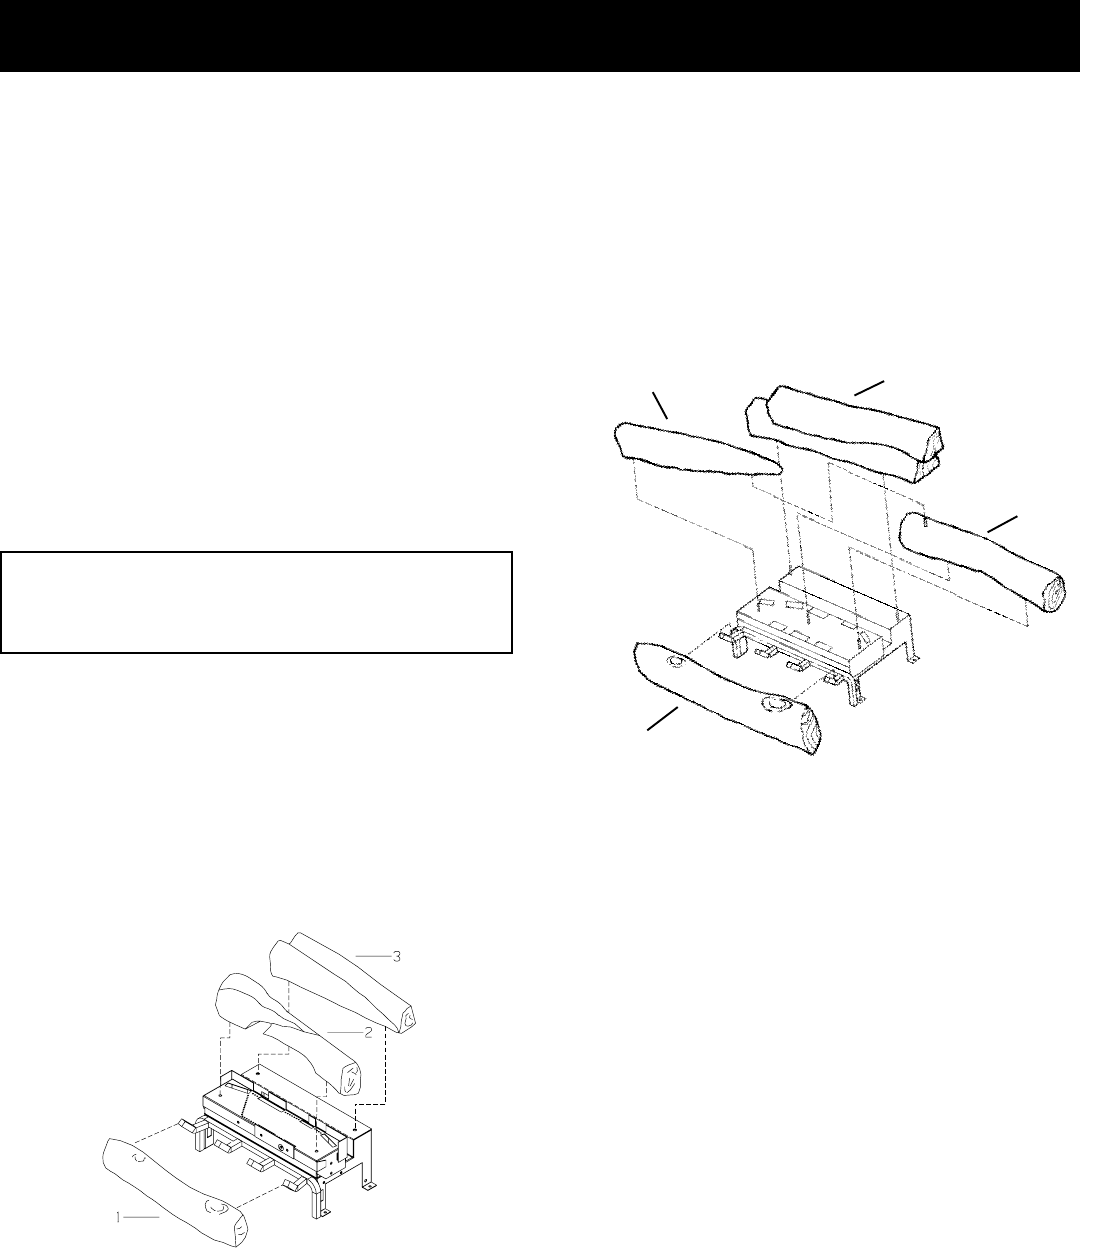
PROPER INSTALLATION SEQUENCE:
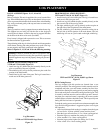
VFYR and VFYM-16SO (Figure 12)
1. Install rear log (#3) behind the pilot assembly directly on the
pins on each side of the rear log shield.
2. The middle log (#2) will go directly on the two pins on the flat
portion of the main burner.
3. Install front log (#1) onto of the grate. The log is located into a
notch area in the front grate area.
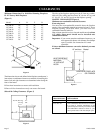
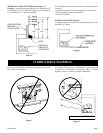
Log Placement
VFYR and VFYM-16SO Logs Shown
Figure 12
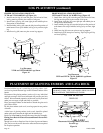
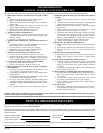
PROPER INSTALLATION SEQUENCE:
VFYR and VFYM-(18, 24, 30)SO (Figure 13)
1. Install front log (#1) onto of the grate. The log is located into a
notch area in the front grate area.
2. Install rear log (#2) behind the pilot assembly directly on the
pins on each side of the rear log shield.
3. The right, middle log (#3) will go directly on the two pins on
the right side of the flat portion of the main burner.
4. The left, middle log (#4) should be placed flat on the pin on
the left side of the flat portion of the main burner. The left,
middle log will rest on a pin located on the right, middle log.
Log Placement
VFYR and VFYM -(18, 24, 30)SO Logs Shown
Figure 13
RWO Curing Process
The logs shipped with this product are formed from a cast
refractory material. The curing process for this material won't be
completed until after your new burner assembly has fired for a
period of time. During this curing period you may notice popping
noises and small pieces of material coming from the logset. This
is caused by moisture near the surface of the logs and is normal.
Anytime your vent-free burner is operating, the screen curtains
on the fireplace or firebox should be closed. This is especially true
during the first few hours of operation.
To help the curing process and achieve maximum strength in the
logs, the following procedure is suggested to place a new logset
into operation.
• After installation and leak testing is complete, burn the logset
on low fire for 1/2 hour with the screen curtains closed.
• Shut the logset off and allow a 1/2 to 1 hour cooling period.
• Burn the logset at a medium fire setting for 1/2 hour.
• Allow another 1/2 to 1 hour cooling period.
• Burn the logset on the highest fire setting for 1/2 hour.
• Allow a final 1/2 to 1 hour cooling period.
3
2
4
1