


15
#6-32 x1/2" (12.7mm)
Socket cap allen screw
#6-32 x1/2" (12.7mm)
Socket cap allen screw
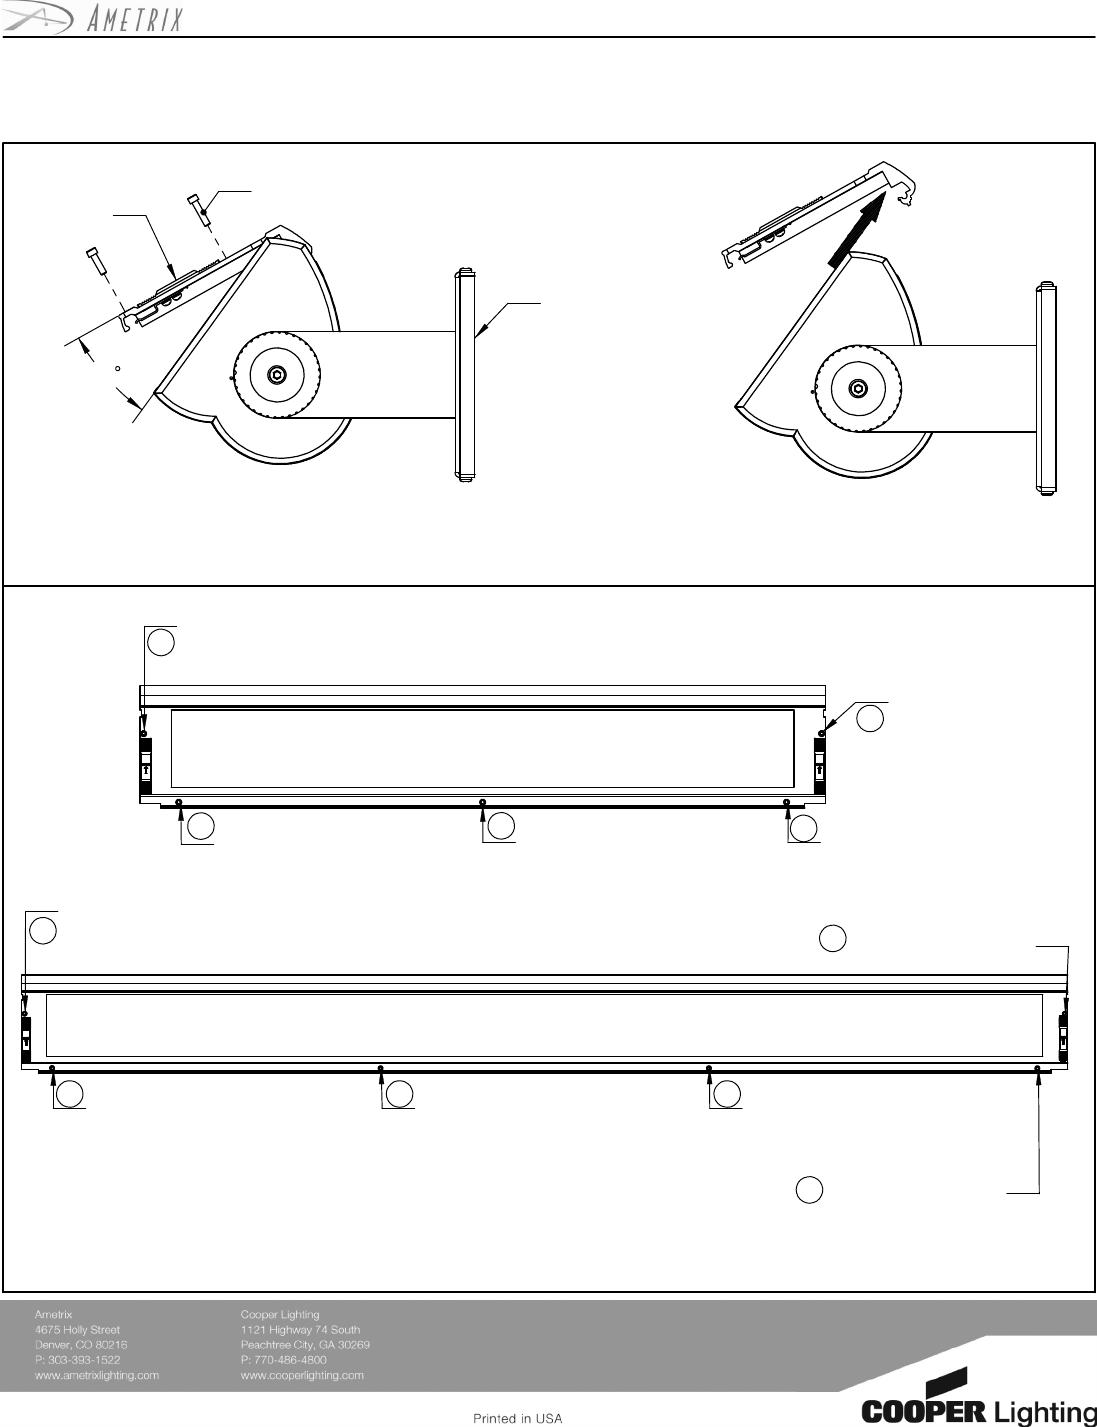
2 & 3ft Fixtures
Socket cap allen screw
#6-32 x5/8" (15.8mm)
Socket cap allen screw
#6-32 x1/2" (12.7mm)
#6-32 x5/8" (15.8mm)
Socket cap allen screw
4ft Fixtures
4
1
5
2
3
To Remove Fixture Door
Door Latch
open.
If fixture is indoor, slide door latches to open.
2. If fixture is outdoor, remove screws and slide door latches to
1.
This side
to surface
Repeat sequence tightening all screws to a final 10 inch pounds of torque.
1. Tighten each screw in the order specified above.
2. Using torque Allen driver, and beginning with screw 1, tighten screw to 5 inch pounds of torque.
3. Next, tighten screw 2 to 5 inch pounds of torque.
4. Continue through all screws, following above sequence, tightening each screw to 5 inch pounds of torque.
5.
3. After releasing door, hold door at approximately a
fifteen degree angle and push door away from fixture.
ADY071485 REV A(ECN070344)
Torque Sequence
Screws on outdoor
fixture only
#6-32 x1/2" (12.7mm)
Socket cap allen screw
#6-32 x5/8" (15.8mm)
Socket cap allen screw
#6-32 x1/2" (12.7mm)
Socket cap allen screw
#6-32 x1/2" (12.7mm)
Socket cap allen screwSocket cap allen screw
#6-32 x1/2" (12.7mm)
#6-32 x5/8" (15.8mm)
Socket cap allen screw
5 1
3
2
4
6
Removing and Sealing Ametrix Fixture Doors
Sheet 1 of 1
mount fixtures vertically.
Supplementary Installation Instructions
Warning
: Before starting any work ensure
that all sources of power are turned off. All
work must meet local/national codes and be
performed by a certified electrician.
Do not
Specific details such as fixture and pendant style may differ,
however the mounting configurations are universal.