


IMPORTANT SAFETY
INSTRUCTIONS
WHEN USING ELECTRICAL APPLIANCES, BASIC
SAFETY PRECAUTIONS SHOULD ALWAYS BE
FOLLOWED, INCLUDING THE FOLLOWING:
READ ALL INSTRUCTIONS BEFORE
USING THIS MIRROR
DANGER– TO REDUCE THE RISK OF
ELECTRIC SHOCK: ALWAYS UNPLUG THIS MIRROR
FROM THE ELECTRICAL OUTLET BEFORE CLEANING.
WARNING– TO REDUCE THE RISK
OF BURNS, ELECTROCUTION, FIRE, OR INJURY
TO PERSONS:
1. Unplug from outlet before putting on or taking
off parts.
2. This mirror should not be used by or near children
or individuals with certain disabilities.
3. Use this mirror only for its intended use
as described in these instructions. Do not
use attachments not recommended by the
manufacturer.
4. Never operate this mirror if it has a damaged
cord or plug, if it is not working properly, if it
has been dropped or damaged, or dropped into
water. Return the mirror to a service center for
examination and repair.
5. Keep the cord away from heated surfaces.
6. Never drop or insert an object into any opening.
7. Do not use outdoors.
8. Do not operate where aerosol (spray) products
are being used or where oxygen is being
administered.
9. To disconnect, turn all controls to the off position,
then remove plug from outlet.
10. Be sure mirror is not in a position where it can
reflect sunlight; reflected sunlight can cause fire.
11. Do not use on a soft surface such as a bed, where
openings may be blocked.
12. Touch mirror base until light shuts off, allow unit to
cool and unplug cord before replacing light bulbs.
13. Do not place or store mirror where it can fall or be
pulled into a tub or sink.
14. If mirror falls into water, unplug it immediately.
Do not reach into the water.
15. Never use while sleeping.
16. Do not use bulb greater than 30 watts.
Use in any 120 volt, 60 hertz AC electric outlet
(ordinary house current). Do not use it in any other
electrical outlet.
17. To protect against electrical hazards, do not use
while bathing or in the shower.
18. Unplug the mirror from outlet before cleaning.
Do not leave mirror unattended when it is
plugged in.
FOR HOUSEHOLD USE ONLY
SAVE THESE
INSTRUCTIONS
INSTALLATION INSTRUCTIONS
Wall Mount Mirror
1. Remove mounting bracket from base or mirror.
Leave long screws in bracket.
2. Using
3
/
8
" drill size, drill two holes in wall the same
distance apart as two opposite slots in
bracket. Screw into wall stud if possible. If drilling
into stud, use
1
/
8
" drill size. Otherwise insert two wall
anchors in holes.
CAUTION: Do not drill into electrical wiring through
wall. Check with electrician if necessary.
3. Screw bracket onto wall, into the anchors.
4. Attach mirror to bracket by placing long screws
through the two holes in mirror’s base. Secure with
knurled nuts. Cord should be facing floor.
OPERATING
INSTRUCTIONS
To reduce the risk of electric shock, this furnishing has
a polarized plug (one blade is wider than the other).
This plug will fit in a polarized outlet only one way.
If the plug does not fit fully in the outlet, reverse the
plug. If it still does not fit, contact a qualified electrician
to install the proper outlet. Do not change the plug in
any way.
1. Your lighted makeup mirror features a 1x and 5x
magnification for the 8" mirror head.
2. Your lighted makeup mirror will adjust to many
different angles. Simply tilt the neck or head backward
or forward to adjust to the desired angle. Your mirror
will also swivel so that you can use either the normal,
flat mirror or the magnifying
mirror located on the opposite side.
3. Plug into any standard wall outlet (120 Volt AC). Turn
the rotary switch clockwise to the On
position.
4. After use, turn switch clockwise again to the
Off position.
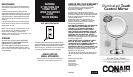
TO REPLACE BULB
CAUTION: TURN OFF POWER AND UNPLUG. ALLOW
TO COOL AT LEAST 3 MINUTES BEFORE REPLACING
BULB.
NOTE: Do not use a bulb greater than 30 watts.
Contact a Conair service center at 1-800-3 CONAIR
for replacement bulb information (ask for replacement
bulb RP34). Bulbs are $1.50 each including shipping
and handling.
1. Unscrew screws from opposite sides of the mirror
housing near the rotating hinges (Fig. 1).
2. Carefully lift off the top half of the housing from the
bottom half that is affixed to the arm.
3. Unscrew the old bulb and replace with the
new bulb (Fig. 2).
4. Carefully replace the top housing half after locating
and aligning the screw holes to the bottom half. If the
holes don’t line up, turn top half of mirror 180˚.
5. Insert two screws back into screw holes and
tighten with screw driver. Do not over-tighten.
Figure 1
Figure 2