8804-000137 Rev. C 04/11/05
CHIEF MANUFACTURING INC. 1-800-582-6480, Fax: 1-877-894-6918, Email: chief@chiefmfg.com
INSTALLATION INSTRUCTIONS
FSA-1001 and KSA-1001
FLAT PANEL WALL PLATE ACCESSORY
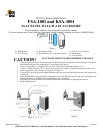
Prior to assembly, unpack carton completely and verify contents.
If you are missing any of the following components, please contact Customer Service at 1-800/582-6480.
(1) Wall Bracket (1) Wall Plate Casting (1) 5/16-18 x .75” Set Screw
(1) 5/32” Hex Key (2) Phillips Head #10 x 2-1/2” Wood Screws (2) #10 Washers
(1) 3/16” Hex Key
FLAT PANEL DISPLAYS ARE EXTREMELY FRAGILE.
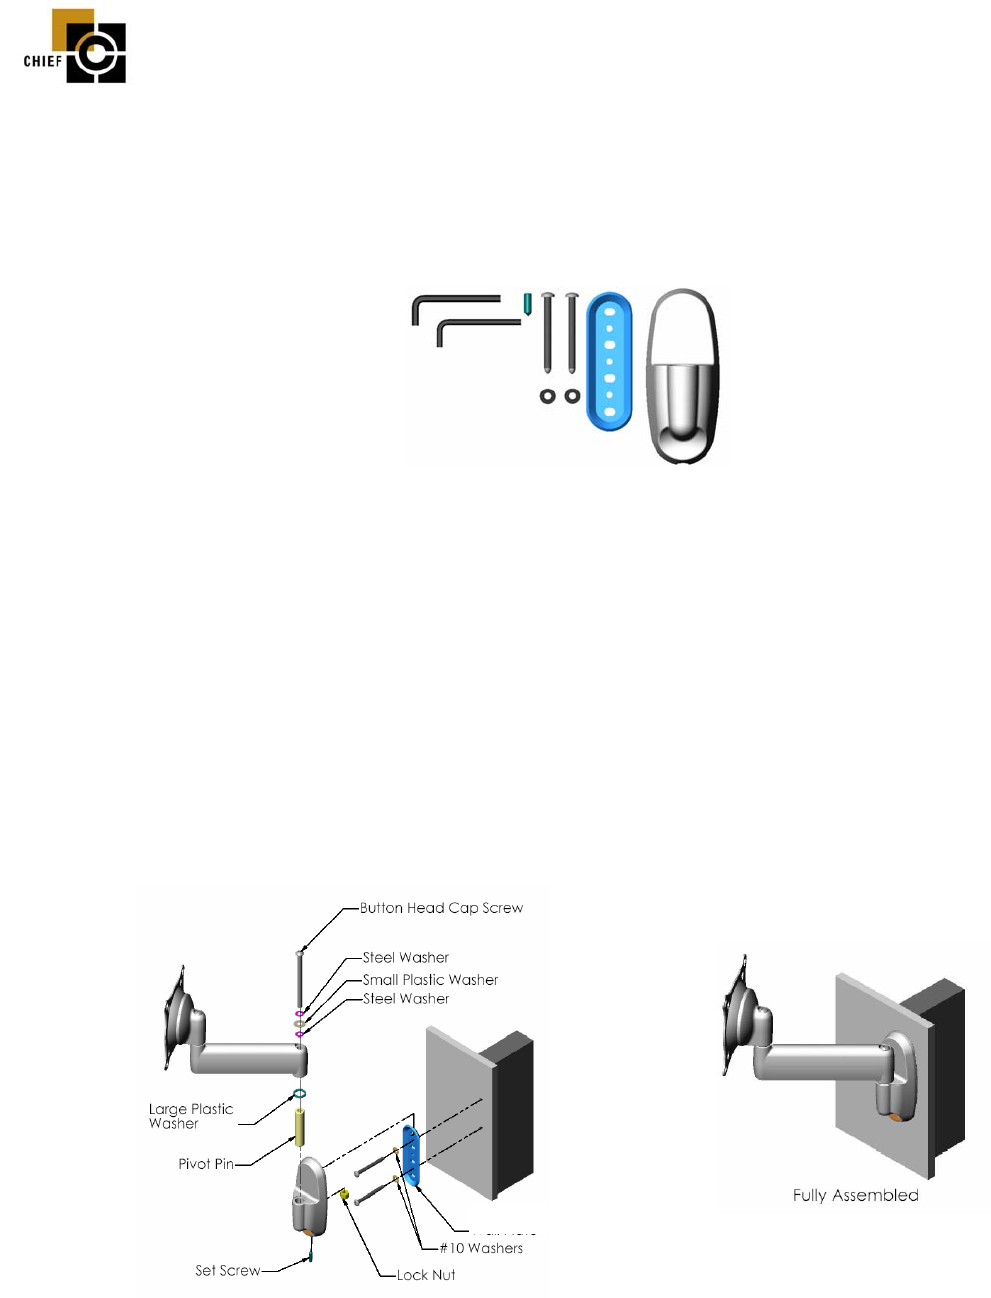
1. Using the 3/16” hex key provided, remove the button head cap screw securing the monitor interface to the arm or
other modular flat panel arm component (i.e. desk clamp) (see Figure 2).
2. Using the wall bracket as a template, drill two 3/32” pilot holes to a minimum depth of 1-1/2”.
3. Using two Phillips head #10 x 2-1/2” wood screws and two #10 washers, secure the wall bracket (Insure level).
4. Install components at pivot in order (see Figure 2 and Figure 3).
5. Using the 3/16” hex key provided, tighten the button head cap screw until the desired amount of pivoting friction
is achieved.
6. Install the KSA/FSA on the wall bracket by placing the top of the KSA/FSA over the top of the wall bracket and
pushing the bottom of the KSA/FSA over the bottom of the wall bracket
7. Using the 5/32 hex key provided, secure the KSA/FSA to the wall bracket by tightening the setscrew.
8. Refer to FWD manual.
Figure 1
Figure 2
CAUTION!
Figure 3
Wall Bracke