Before lighting the stove check with the
installer that the work and checks
described in the Installation Instructions
have been carried out correctly and that
the chimney has been swept, is sound and
free from any obstructions.
FUELS
Wood
Wood must be dry and well seasoned.
Ideally it should be cut, split and stacked
under cover for at least a year and
preferably two years before being burnt.
Hard woods, such as Ash, Beech and Oak
are preferable to Soft woods such as Pine.
The wood should be burnt in a bed of ash
on the flat base of the stove.
Burning wet unseasoned wood will result
in heavy tar deposits in the chimney and
reduced outputs.
Peat
Cut peat should be dried before burning
to reduce tar deposits. Peat should be
burnt in the same manner as wood, on the
flat base of the stove in a bed of ash.
House Coal
Doubles, Trebles and Cobbles may be
burnt, do not use singles or coal dust (or
"slack"). Coal must only be burnt with
the optional coal kit, burning it on the flat
base of the stove may cause damage. A
little extra care is needed when burning
coal, please refer to the section "Special
Points When Burning House Coal" later
in the instructions.
Smokeless Fuel
A wide variety of smokeless fuels are
available, many of which are suitable for
use on your Country 8. Some of these are
listed below:
Ancit
Anthracite Large Nuts
Centurion
Cosycoke
Extracite
Homefire
Maxibrite
Phurnacite
Welsh Dry Steam Coal (Large Nuts).
Smokeless fuels must only be burnt with
the optional coal kit, burning it on the flat
base of the stove may cause damage.
At first you may find it helpful to try
several fuels to find the most suitable. If
you are unable to obtain the fuel you
want ask your supplier, or an approved
fuel distributor to suggest an alternative.
Only smokeless fuels may be burnt in
smoke control areas.
DOOR OPERATION
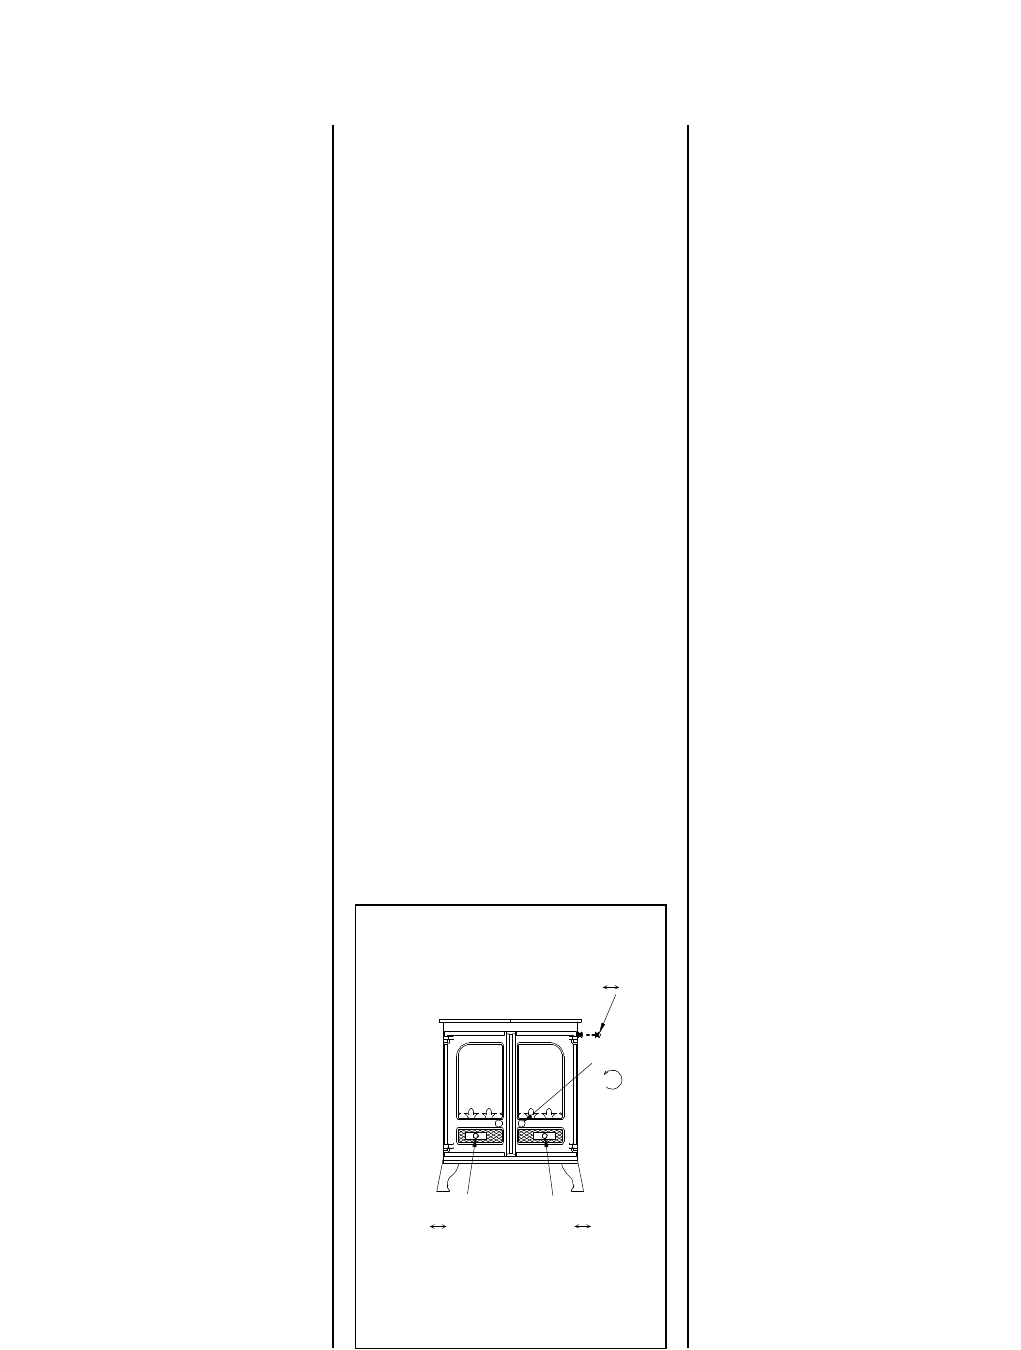
Turn the right-hand door knob
anti-clockwise to open and clockwise to
close, (see Fig. 1.)
FITTING THE OPTIONAL
COAL KIT
Before burning coal or smokeless fuel the
coal kit must be fitted. This consists of a
grate and an ashpan.
Fit the legs onto the grate, ensuring that
the grate is the right way up. Remove the
front fence and place the grate in the
stove so that it comes hard up against the
back fire brick. Replace the front fence so
that the slope rests on the top of the
grate. Slide the ashpan in under the grate.
LIGHTING
On initial lighting, the stove may smoke
and give off an odour as the silicon paint
with which the firebox is painted reacts
to the heat. This is normal and will cease
after a short time, but meanwhile the
room should be kept well ventilated.
At first only light a small fire and burn it
slowly for two hours to allow any residual
moisture in the bricks to evaporate.
IMPORTANT When burning wood or
peat on the base of the stove there must
be a bed of ash to prevent damage to the
base. When first lighting the stove, if
there is no ash available then a make a
layer of sand or earth about 12mm (1/2
inch) thick on the base to prevent any
damage.
The stove may be lit using dry kindling
wood and paper or fire lighters. Place the
paper, or fire lighters, and kindling on the
base or the grate and cover with
approximately 2 inches of fuel. Open the
air slides in the doors and open the
airwash control fully (see Fig. 1). Light
the paper or fire lighters. Close the doors
until the fuel is well ignited then load
with fuel and adjust the air controls to the
required setting.
When relighting the stove, leave the ash
on the base, if burning wood or peat,
unless it is beginning to block the slots in
the front fence, in which case some of it
may be removed. If burning solid fuel
clear the grate and empty the ashpan
before relighting.
CONTROLLING THE FIRE
The rate of burning and hence the output
is controlled by the door air slides and
the airwash control (see Fig. 1).
The air slides in the doors should be used
when lighting or when rapid burning is
required. They should not be left fully
CHARNWOOD COUNTRY 8 & 12 WB
OPERATING INSTRUCTIONS
Door Knob
Door Airslide Door Airslide
Closed Open Open Closed
Closed Open
Control
Airwash
To Open
Fig. 1. Stove Controls
Page 2
Country 8 &12 WB 6/97


