


12
Step 8 — Make Outdoor-Air Adjustments and
Install Outdoor-Air Hood
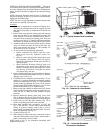
MANUAL OUTDOOR-AIR DAMPER — The outdoor-air
hood and screen are attached to the basepan at the bottom of
the unit for shipping.
Assembly:
1. Determine quantity of ventilation required for building.
Record amount for use in Step 8.
2. Remove and save outdoor air opening panel and screws.
See Fig. 13.
3. Separate hood and screen from basepan by removing the
4 screws securing them. Save all screws.
4. Replace outdoor air opening panel.
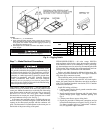
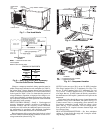
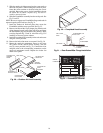
5. Place hood on front of outdoor air opening panel. See
Fig. 14 for hood details. Secure top of hood with the
4 screws removed in Step 3. See Fig. 15.
6. Remove and save 6 screws (3 on each side) from sides of
the manual outdoor-air damper.
7. Align screw holes on hood with screw holes on side of
manual outdoor-air damper. See Fig. 14 and 15. Secure
hood with 6 screws from Step 6.
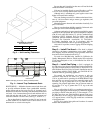
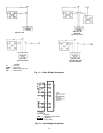
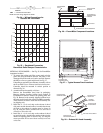
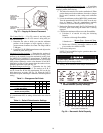
8. Adjust minimum position setting of the damper blade by
adjusting the manual outdoor-air adjustment screws on
the front of the damper blade. See Fig. 13. Slide blade
vertically until it is in the appropriate position determined
by Fig. 16. Tighten screws.
9. Remove and save screws currently on sides of hood.
Insert screen. Secure screen to hood using the screws. See
Fig. 15.
OUTDOOR
AIR OPENING
PANEL
3 SCREWS
(SIDE)
Fig. 13 — Damper Panel with Manual Outdoor-Air
Damper Installed
Fig. 14 — Outdoor-Air Hood Details
Fig. 15 — Outdoor-Air Damper with
Hood Attached
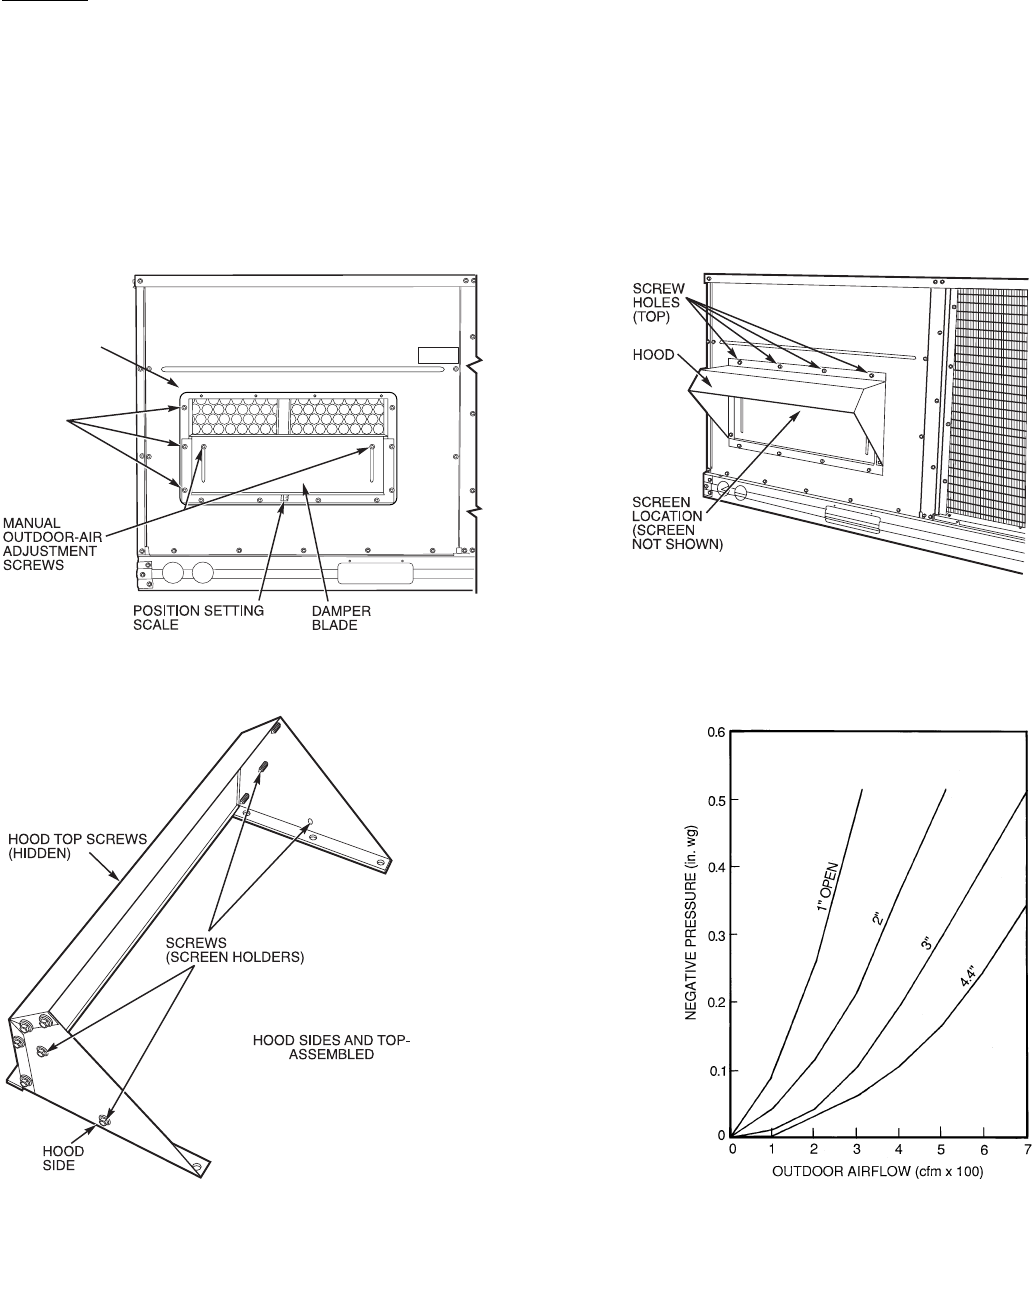
Fig. 16 — Position Setting