


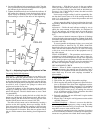


When using brackets, the diameter in the alignment for-
mula (see Near Final Alignment, Connecting Angular Mis-
alignment section) will be that of the circle through which
the dial indicator rotates.
1. Shut down the chiller.
2. With chiller at operating temperature, quickly install
brackets.
3. Check that alignment is within .002 in. TIR and
.00033 in. per in. of traverse (0.00033 mm per mm of
traverse) across the diameter of measurement. Adjust align-
ment as required. (Refer to Near Final Alignment
section.)
4. Remove brackets and run chiller until operating tempera-
ture is again reached.
5. Recheck the alignment per steps 1 through 4 until it re-
mains within the specified tolerances.
Be sure that coupling guards are replaced after these checks.
DOWELING
Techniques — After a hot alignment check has been com-
pleted, the compressor, gear and drive must be doweled to
their sole plates. Doweling permits exact repositioning of com-
ponents if they have to be moved.
1. Doweling must be completed with equipment at maxi-
mum operating temperature (full load).
2. Use No. 8 taper dowels to dowel the compressor, gear,
and drive to the base. Use a
13
⁄
32
-in. drill and No. 8 taper
reamer with straight flutes. Drill pilot hole and then ex-
pand the pilot hole to final dimension.
3. Fit dowel so that
1
⁄
16
-in. of taper is left above the equip-
ment foot. If dowel holes are re-reamed as a result of re-
alignment, be sure dowels are tight and do not bottom.
4. Place dowels as nearly vertical as possible.
5. Coat the dowels with white lead or other lubricant to pre-
vent rusting.
6. Tap dowel lightly into position with a small machinist’s
hammer. A ringing sound will indicate proper seating.
Dowel the suction end of the compressor base, the two
feet at the high speed end of the gear, and the drive feet in
accordance with the drive manufacturer’s instructions. The
number of dowels used in the drive is usually four, but some
manufacturers require more.
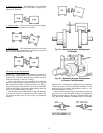
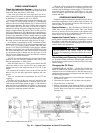
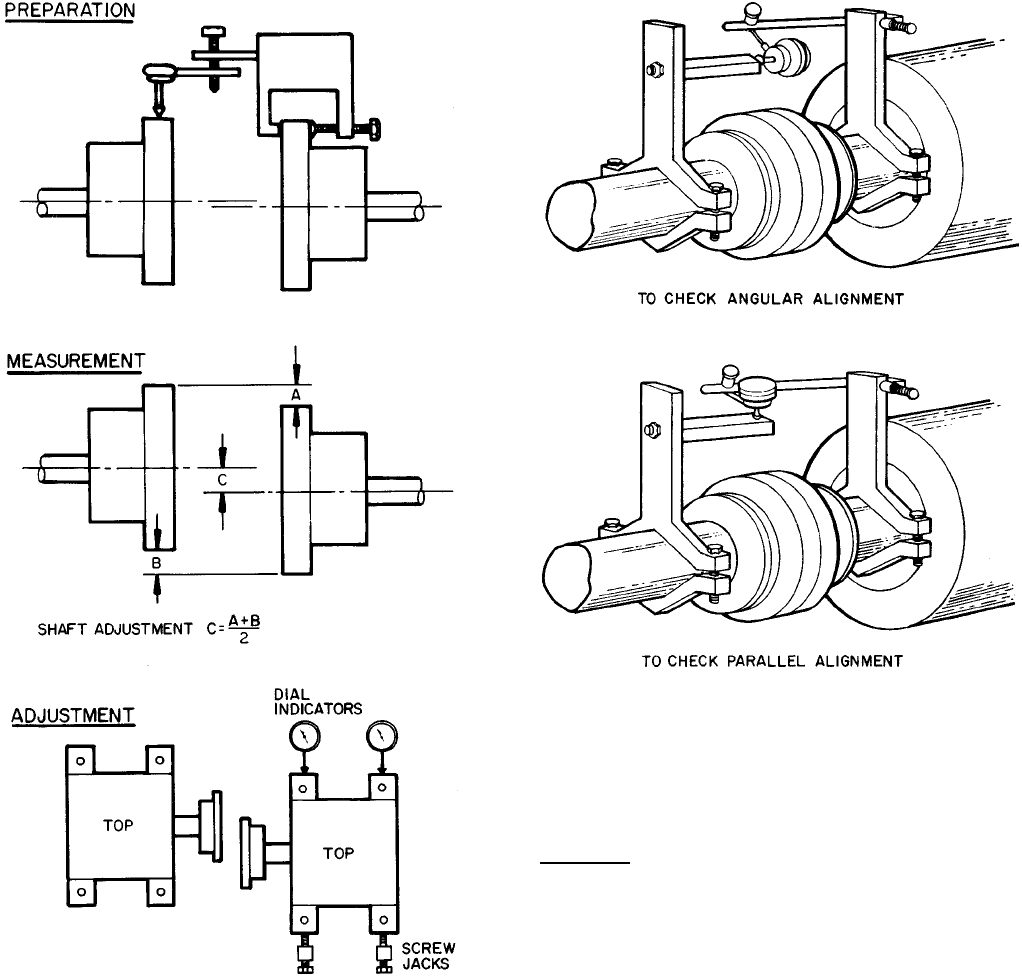
Fig. 43 — Alignment Check — Assembled Coupling
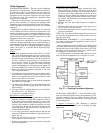
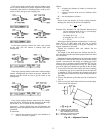
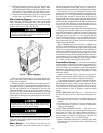
Fig. 42 — Correcting Parallel Misalignment
75