


4. Leak Determination — If an electronic leak detector in-
dicates a leak, use a soap bubble solution, if possible, to
confirm it. Total all leak rates for the entire chiller. Leak-
age for the entire chiller at rates greater than the EPA (En-
vironmental ProtectionAgency) guidelines or local codes
must be repaired. Note the total chiller leak rate on the
start-up report. This leak rate repair is only for new start-
ups. See page 67 in General Maintenance section for rec-
ommendations on checking leak rates and leak repairs for
operating chillers.
5. If no leak is found during the initial start-up procedures,
complete the transfer of refrigerant gas (see Pumpout and
Refrigerant Transfer Procedures section, page 63.)
6. If no leak is found after a retest:
a. Transfer the refrigerant to the economizer/storage ves-
sel or other storage tank and perform a standing vacuum
test as outlined in the Standing Vacuum Test section,
this page.
b. If the chiller fails this test, check for large leaks
(Step 2b).
c. Dehydrate the chiller if it passes the standing vacuum
test. Follow the procedure in the Chiller Dehydration
section, below. Charge chiller with refrigerant (see
Pumpout and Refrigerant Transfer Procedures section,
page 63).
7. If a leak is found, pump the refrigerant back into the
economizer/storage vessel or other storage tank.
8. Transfer the refrigerant until the chiller pressure is
18 in. Hg (41 kPa absolute).
9. Repair the leak and repeat the procedure, beginning from
Step 2g to ensure a leak-tight repair. (If chiller is opened
to the atmosphere for an extended period, evacuate it be-
fore repeating the leak test.)
Standing Vacuum Test — When performing the stand-
ing vacuum test or chiller dehydration, use a manometer or
a wet bulb indicator. Dial gages cannot indicate the small
amount of acceptable leakage during a short period of time.
1. Attach an absolute pressure manometer or wet bulb in-
dicator to the chiller.
2. Evacuate the vessel (see Pumpout and Refrigerant Trans-
fer Procedures section, page 63) to at least 18 in. Hg vac,
ref 30-in. bar (41 kPa), using a vacuum pump or the pump-
out unit.
3. Valve off the pump to hold the vacuum and record the
manometer or indicator reading.
4. a. If the leakage rate is less than 0.05 in. Hg (0.17 kPa)
in 24 hours, the chiller is sufficiently tight.
b. If the leakage rate exceeds 0.05 in. Hg (0.17 kPa) in
24 hours, repressurize the vessel and test for leaks. If
refrigerant is available in the other vessel, pressurize
by following Steps 2-10 of Return Chiller To Normal
Operating Conditions section, page 67. If not, use ni-
trogen and a refrigerant tracer. Raise the vessel pres-
sure in increments until the leak is detected. If refrig-
erant is used, the maximum gas pressure is approximately
70 psig (483 kPa) at normal ambient temperature.
5. Repair the leak, retest, and proceed with dehydration.
Chiller Dehydration — Dehydration is recommended
if the chiller has been open for a considerable period of time,
if the chiller is known to contain moisture, or if there has
been a complete loss of chiller holding charge or refrigerant
pressure.
Do not start or megohm-test the compressor motor or
oil pump motor, even for a rotation check, if the chiller
is under dehydration vacuum. Insulation breakdown and
severe damage may result.
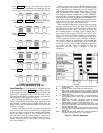
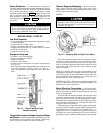
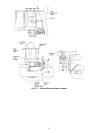
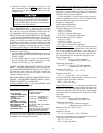
Dehydration is readily accomplished at room tempera-
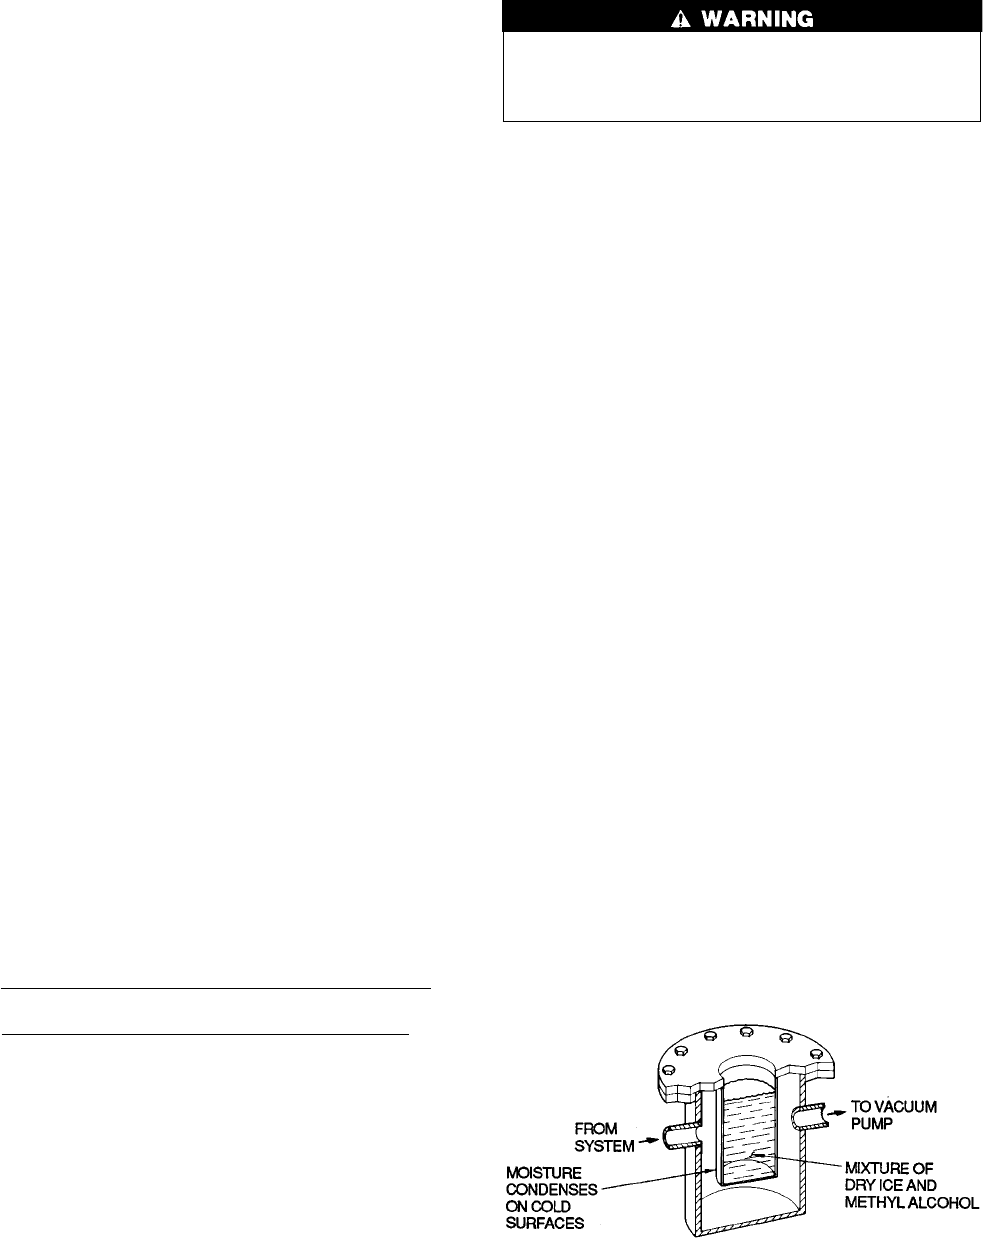
tures. Using a cold trap (Fig. 26) may substantially reduce
the time required to complete the dehydration. The higher
the room temperature, the faster dehydration takes place. At
low room temperatures, a very deep vacuum is required for
boiling off any moisture. If low ambient temperatures are
involved, contact a qualified service representative for the
dehydration techniques required.
Perform dehydration as follows:
1. Connect a high capacity vacuum pump (5 cfm
[0.002 m
3
/s] or larger is recommended) to the refrigerant
charging valve (Fig. 6). Tubing from the pump to the chiller
should be as short and as large in diameter as possible to
provide the least resistance to gas flow.
2. Use an absolute pressure manometer or a wet bulb vacuum
indicator to measure the vacuum. Open the shutoff valve
to the vacuum indicator only when taking a reading. Leave
the valve open for 3 minutes to allow the indicator vacuum
to equalize with the chiller vacuum.
3. Open all isolation valves (if present), if the entire chiller
is to be dehydrated.
4. With the chiller ambient temperature at 60 F (15.6 C) or
higher, operate the vacuum pump until the manometer reads
29.8 in. Hg vac, ref 30 in. bar. (0.1 psia)(–100.61 kPa) or
a vacuum indicator reads 35 F (1.7 C). Operate the pump
an additional 2 hours.
Do not apply a greater vacuum than 29.82 in. Hg vac
(757.4 mm Hg) or go below 33 F (0.56 C) on the wet
bulb vacuum indicator. At this temperature/pressure, iso-
lated pockets of moisture can turn into ice. The slow rate
of evaporation (sublimation) of ice at these low temperatures/
pressures greatly increases dehydration time.
5. Valve off the vacuum pump, stop the pump, and record
the instrument reading.
6. After a 2-hour wait, take another instrument reading. If
the reading has not changed, dehydration is complete. If
the reading indicates a vacuum loss, repeat Steps 4 and 5.
7. If the reading continues to change after several attempts,
perform a leak test up to the maximum 180 psig
(1241 kPa) pressure. Locate and repair the leak, and re-
peat dehydration.
Fig. 26 — Dehydration Cold Trap
49