1
Installation Instructions
581B036--072
581C024--060
SINGLE--PACKAGE ROOFT OP HEAT ING/COOLING
STANDARD AND LOW NOx UNITS
TABLE OF CONTENTS
Page
SAFETY CONSIDERATIONS 1........................
INSTALLATION 1..................................
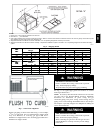
Step 1--Provide Unit Support 2.......................
ROOF CURB 2................................
SLAB MOUNT 2..............................
ALTERNATE UNIT S UPPORT 2.................
Step 2--Field Fabricate Ductwork 2...................
Step 3 --Install External Trap for Condensate Drain 2.......
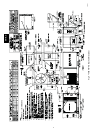
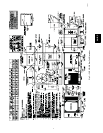
Step 4--Rig and Place Unit 2.........................
POSITIONING 2..............................
Step5—InstallFlueHood 4........................
Step 6 — Install Gas Piping 4........................
Step 7 — Make Electrical Connections 8................
FIELD POWER SUPPLY 8......................
FIELD CONTROL WIRING 8....................
HEAT ANTICIPATOR SETTINGS 8...............
Step 8 — Adjust Factory-Installed Options 16...........
PERFECT HUMIDITY ADAPTIVE
DEHUMIDIFICATION SYSTEM 16..............
MANUAL OUTDOOR-AIR DAMPER 16..........
CONVENIENCE OUTLET 16....................
OPTIONAL ECONOMI$ER IV 18................
ECONOMI$ER IV STANDARD SENSORS 19......
ECONOMI$ER IV CONTROL MODES 20.........
Step 9 — Adjust Evaporator-Fan Speed 25..............
PRE--S TART--UP 41..................................
START-- UP 41.......................................
SERVICE 45........................................
TROUBLESHOOTING 55.............................
START-- UP CHECKLIST 60...........................
SAFETY CONSIDERATI ONS
Installation and servicing of air-conditioning equipment can be
hazardous due to system pressure and electrical components.
Only trained and qualified service personnel should install, repair,
or service air-conditioning equipment.
Untrained personnel can perform basic maintenance functions of
cleaning coils and filters and replacing filters. All other operations
should be performed by trained service personnel. When working
on air-conditioning equipment, observe precautions in the
literature, tags and labels attached to the unit, and other safety
precautions that may apply.
Follow all safety codes. Wear safety glasses and work gloves. Use
quenching cloth for unbrazing operations. Have fire extinguishers
available for all brazing operations.
Recognize safety information. This is the safety--alert symbol
. When you see this symbol on the unit and in instructions or
manuals, be alert to the potential for personal injury.
Understand the signal words DANGER, WARNING, and
CAUTION. These words are used with the safety--alert symbol.
DANGER identifies the most serious hazards which will result in
severe personal injury or death. WARNING signifies a hazard
which could result in personal injury or death. CAUTION is used
to identify unsafe practices which may result in minor personal
injury or product and property damage. NOTE is used to
highlight suggestions which will result in enhanced installation,
reliability, or operation.
ELECTRICAL SHOCK HAZARD
Failure to follow this warning could cause personal
injury or death.
Before performing service or maintenance operations
on unit, turn off main power switch to unit and install
lockout tag. Ensure electrical service to rooftop unit
agrees with voltage and amperage listed on the unit
rating plate.
!
WARNING
FIRE, EXPLOSION HAZARD
Failure to follow this warning could cause death and/or
property damage.
Disconnect gas piping from unit when leak testing at
pressure greater than
1
/
2
psig. Pressures greater than
1
/
2
psig will cause gas valve damage resulting in hazardous
condition. If gas valve is subjected to pressure greater
than
1
/
2
psig, it must be replaced before use. When
pressure testing field-supplied gas piping at pressures of
1
/
2
psig or less, a unit connected to such piping must be
isolated by manually closing the gas valve(s).
!
WARNING
INSTALLATION
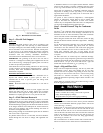
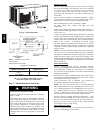
Unit is shipped in the vertical discharge configuration. To convert
to horizontal discharge application, remove duct opening covers.
Using the same screws, install covers on duct openings in
basepan of unit with insulation-side down. Seals around
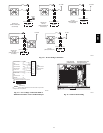
openings must be tight. (See Fig. 1.)


