


75.5268.01 20070111 Page 6 of 7
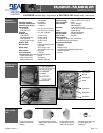
OUTPUT
REDIRECTION
Key 2: towards or away mode detection
Motion towards the detector triggers relay 1.
Motion away from the detector triggers relay 2.
Towards or away mode detection only works if the detection
parameter is set to 1 (bi-directional). Otherwise the sensor
does not detect any motion anymore.
This works also if pedestrian rejection is enabled (immunity
parameter set to 3,4 or 5)
OUTPUT
CONFIGURA-
TION
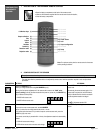
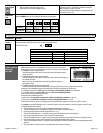
Press the OUTPUT CONFIGURATION key (17).
Use the NUMBER keys 1-4 (1) to select the required output configuration :
Active
Passive
Detection
No Detection
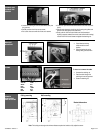
During an adjustment session all parameters may be reset to their factory values in the following way :
PARAMETERS
ACTIONS
FACTORY
VALUES
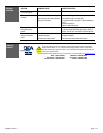
Press the SETUP key (19), then press the NUMBER key 9.
All the parameters (except the access code) are reset to the factory values.
FACTORY VALUES :
Factory Values Table
Parameter Values Factory setting
Sensitivity 0 - 9 7
Hold time 0 - 9 0
Detection mode 1 - 3 2
Rejection mode 1 - 5 1
Output redirection 0 - 2 0
Output configuration 1 - 4 1
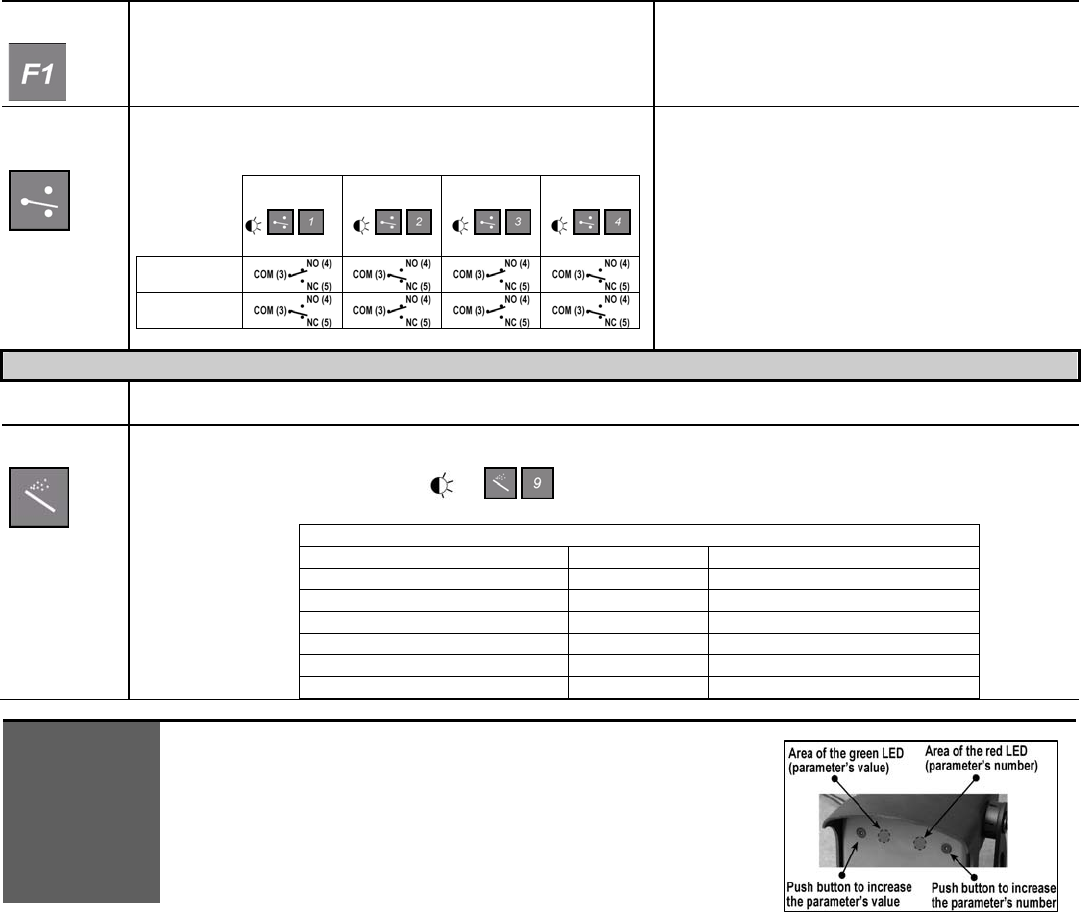
Without remote control all of the parameters can be set using the 2 push buttons.
Note: These two buttons are accessible from the sensor front cover with a small point.
• To adjust the sensor using the buttons :
Press and hold either push button for 2 seconds (until the LEDs flash) and then
release the button ;
• To end adjusting the sensor using the buttons :
Press and hold either push button for 2 seconds (until the LEDs stop flashing) and
then release the button;
Note : if no button is pressed within 20 seconds the adjustment session is
automatically ended.
• To reset all the parameters to the factory values :
Press and hold both push buttons simultaneously until the two LEDs switch on for 1 second (after 2 seconds).
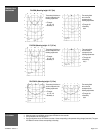
During the manual adjustment session the red and green LEDs flash successively and continuously.
• The flashing number of the red LED provides the number of the displayed parameter (see next table);
• The flashing number of the green LED provides the value of the displayed parameter ;
Note: no green flashing indicates the zero value.
During the manual adjustment session :
• Each press on the right button increases the number of the displayed parameter by one unit ;
• Each press on the left button increases the value of the displayed parameter by one unit.
Note: When the maximum value or the highest number of the parameter is reached, it will return to its minimum values.
For example, to change the sensitivity from 7 to 9 and the rejection mode from “detection of all kind of targets in motion” to High
“Pedestrian/parallel traffic” rejection.
• Press any button for 2 seconds to enter the adjustment session and then release it.
• The red LED flashes once (1 = sensitivity) and the green LED flashes 7 times (sensitivity=7).
• Press the left button twice to increase the sensitivity from 7 to 9.
• The red LED still flashes once (1 = sensitivity) but the green LED flashes 9 times now (sensitivity=9).
• Now press the right button 4 times to move to function 5 (rejection mode).
• The red LED flashes 5 times (5 = rejection mode) and the green LED flashes once (detection of all kind of targets in motion)
• Press the left button 4 times to set the parameter to High “Pedestrian/parallel traffic” rejection.
• The red LED still flashes 5 times (5 = rejection mode) but the green LED flashes 5 times now (High “pedestrian/parallel traffic”
rejection).
• Press any button during 2 seconds to end the adjustment session and then release it.
CONFIGURATION
WITH PUSH
BUTTONS