


3mm
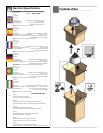
Screw
Power
Board
Connection
Module
20
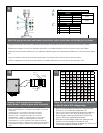
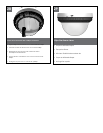
This is what the typical path of illumination will look like with the setting at 30 degrees.
• Para quitar al tablero de energía, utilice el destornillador para lanzar los sujetadores plásticos aplicando la presión a los lados mientras que se saca.
Una el módulo de la conexión según lo demostrado. Una a esta asamblea a la cubierta usando (1) "arandela del tornillo 6-32x3/8 y de la estrella.
• Pour enlever carte d'alimentation, utilisez le tournevis pour libérer les attaches en plastique en s'appliquant la pression aux côtés tout en retirant.
Attachez le module de raccordement comme montré. Attachez cette assemblée au logement en utilisant (1) la "vis 6-32x3/8 et tenez le premier rôle
la rondelle.
• Um das Energie Brett zu entfernen, benutzen Sie Schraubenzieher um Plastikbefestiger freizugeben indem Sie anwenden Druck an den Seiten beim
Ausziehen. Bringen Sie Anschlußmodul an, wie gezeigt. Bringen Sie diese Versammlung zum Gehäuse mit (1) "Schraube 6-32x3/8 und Sternunterlegs-
cheibe an.
• Para remover a placa de poder, use a chave de fenda liberar prendedores plásticos aplicando a pressão aos lados ao retirar. Una o módulo da
conexão como mostrado. Una este conjunto à carcaça usando (1) do "arruela parafuso 6-32x3/8 e da estrela.
• Per rimuovere il bordo di alimentazione, utilizzi il cacciavite per liberare i fermi di plastica applicando la pressione ai lati mentre estraggono. Fissi il
modulo del collegamento come indicato. Fissi questo complessivo all'alloggiamento usando (1) "rondella della vite 6-32x3/8 e della stella.
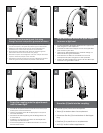
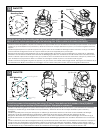
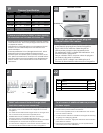
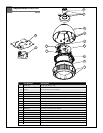
To remove the power board, use screwdriver to release plastic fasteners by applying pressure to sides while pulling out.
Attach connection module as shown. Attach this assembly to the housing using (1) 6-32x3/8” screw and star washer.
This is what the typical path of illumination will look like with the setting at 30 degrees.
• Termine el cableado a la cámara fotográfica. Una el montaje de la cámara fotográfica a la cubierta resbalando
(3) las ranuras abiertas del tornillo sobre los tornillos en la cubierta; apriete los sujetadores en el soporte.
• Accomplissez le câblage à l'appareil-photo. Attachez l'appareil-photo au logement en glissant (3) les fentes
ouvertes de vis au-dessus des vis dans le logement ; serrez les attaches sur la parenthèse.
• Führen Sie die Verdrahtung zur Kamera durch. Bringen Sie die Kamera zum Gehäuse an, indem Sie die (3) geöffne-
ten Schraube Schlitze über den Schrauben im Gehäuse schieben; ziehen Sie die Befestiger am Haltewinkel fest.
• Termine a fiação à câmera. Una o conjunto da câmera à carcaça deslizando (3) os entalhes abertos do parafuso
sobre os parafusos na carcaça; aperte os prendedores no suporte.
• Completi i collegamenti alla macchina fotografica. Fissi il complessivo della macchina fotografica all'alloggiamento
facendo scorrere (3) le scanalature aperte della vite sopra le viti nell'alloggiamento; stringa i fermi sulla staffa.
21
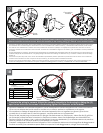
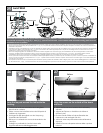
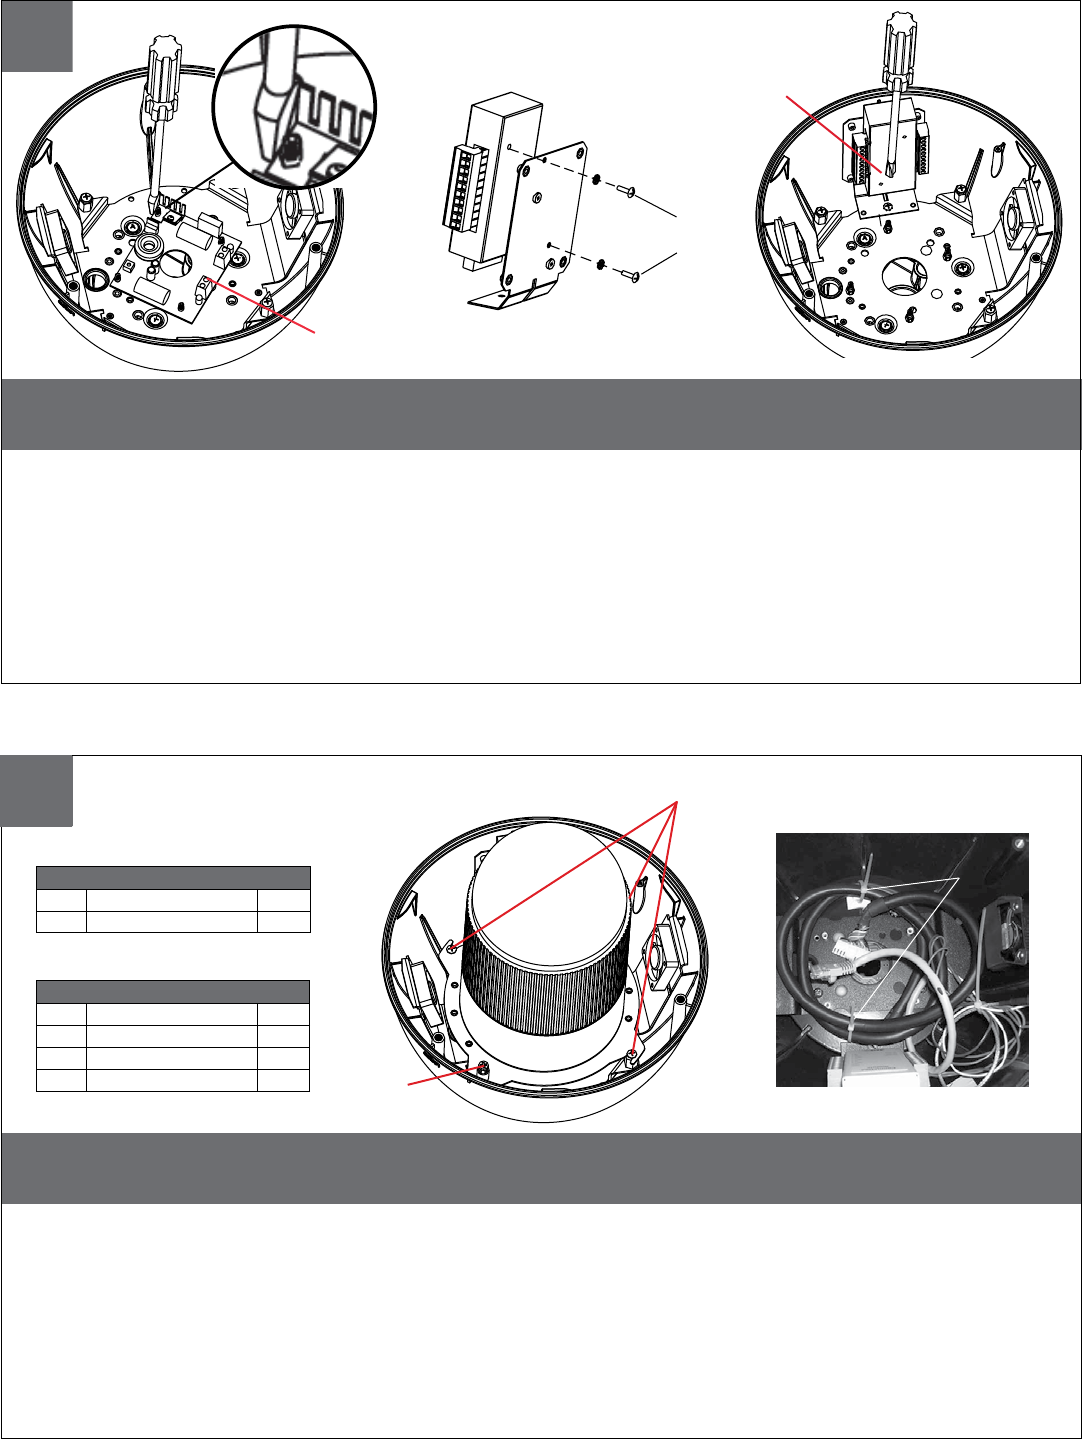
CONTROL
RJ45 Ethernet Connector
ALARMS
1 Alarm 1 Blue
2 Alarm 2 Violet
3 Alarm 3 Gray
4 Common White
POWER
1 Camera Power (24VAC)
Red
2 Camera Power (24VAC)
Orange
Captive
Screw
Open Screw
Slots
Cable
Ties
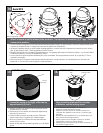
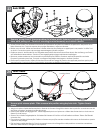
Complete the wiring to camera. Attach the camera assembly to the housing by sliding the (3)
open screw slots over the screws in the housing; tighten the fasteners on the bracket.
17
18