Optional Equipment (for qualified installers only) 39
Travis Industries 93508115 4050113
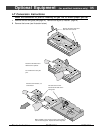
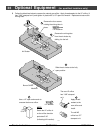
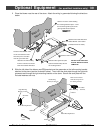
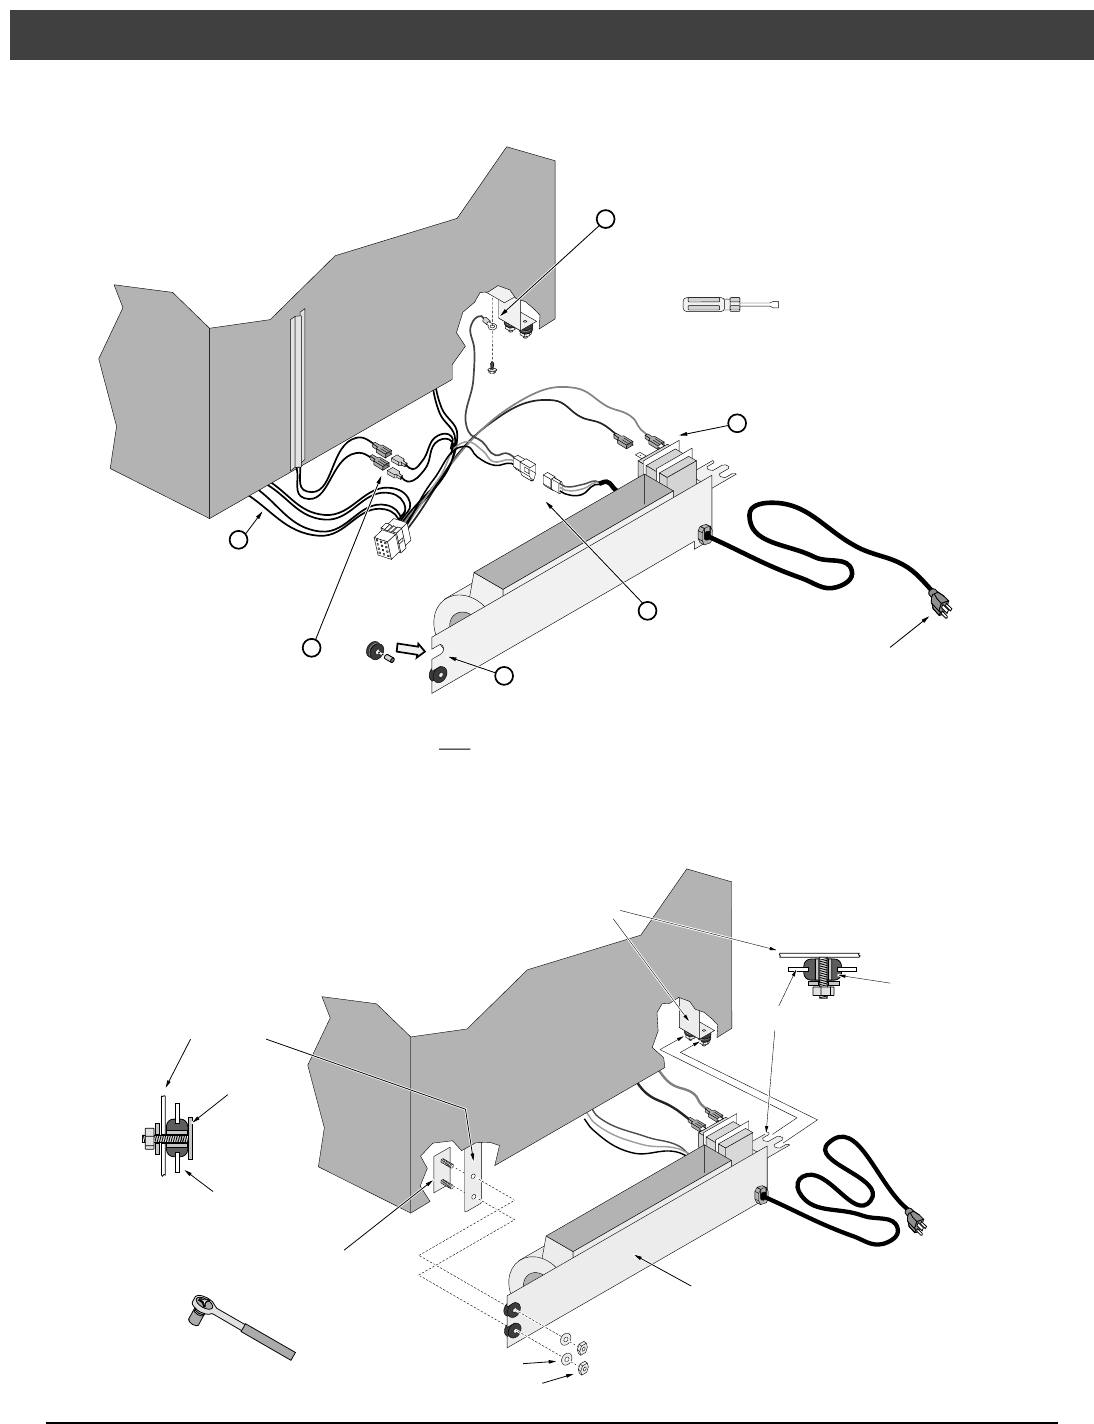
2 Place the blower near the rear of the stove. Attach the wiring in grommets following the directions
below.
Slide the rubber grommets (with
spacers inserted inside) onto the
fan mounting bracket.
Attach the black and white wires
labeled “Blower” to the blower
(orientation does not matter).
Attach the molex connector.
DO NOT PLUG THE STOVE
IN UNTIL INSTALLATION IS
COMPLETE.
Back of
Stove
1/4" Nutdriver
Remove one of the screws holding
the mounting bracket in place. Insert
the screw through the eyelet on the
green ground wire and replace.
a
b
c
d
Attach the two wires leading
from the control box to the two
block wires labeled “Rheostat”.
e
Route the wires labeled “Valve
on/off” and “Solenoid” under
the burner pan to a location
near the gas control valve.
f
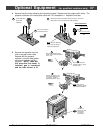
3 Slide the left side of the blower mounting bracket over the grommets on the left mounting bracket
attached to the stove (see the illustration below). Then insert the stud plate through the right side
grommets and through the right mounting bracket on the stove. Secure the stud plate with the
included washers and nuts
Nut
Stud Plate
Washer
11/32”
Socket
Make sure the bracket
slides into the groove on
the rubber grommets.
Left Mounting
Bracket (on stove)
Rubber
Grommet
Blower Mounting
Bracket
Right Mounting
Bracket (on stove)
Back of
Stove
Blower Mounting Bracket
Stud Plate
Blower Mounting Bracket


