


3” screw (12)
Arbor Seat and Back
PLEASE READ COMPLETELY BEFORE BEGINNING ASSEMBLY
ASSEMBLY INSTRUCTIONS
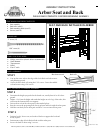
SEAT AND BACK INSTALLED IN ARBOR
TOOLS YOU WILL NEED
• Philips screwdriver (electric driver recommended)
• Small hammer
• Tape measure
• Pencil
• Four 2” nails
STEP 2
SEAT AND BACK TO ARBOR ASSEMBLY
• Determine the height you prefer for the bench seat, usually from 16” to 18” above
ground.
• Deduct 4 3/4” from the height and mark that height on each “leg” of the arbor, this
will locate the bottom of the seat support.
• Drive nails in each of the arbor posts at the marked places.
• Rest the seat on the projecting nails, line it up front and back with the arbor posts.
• Hold the seat firmly to the arbor post and drive 3” screws into all four posts.
• Position back 4” above seat, use books or blocks to support the back and
steady in place
• Position outer edge of back blocks flush with the arbor post.
• Secure the back to arbor using 3” screws.
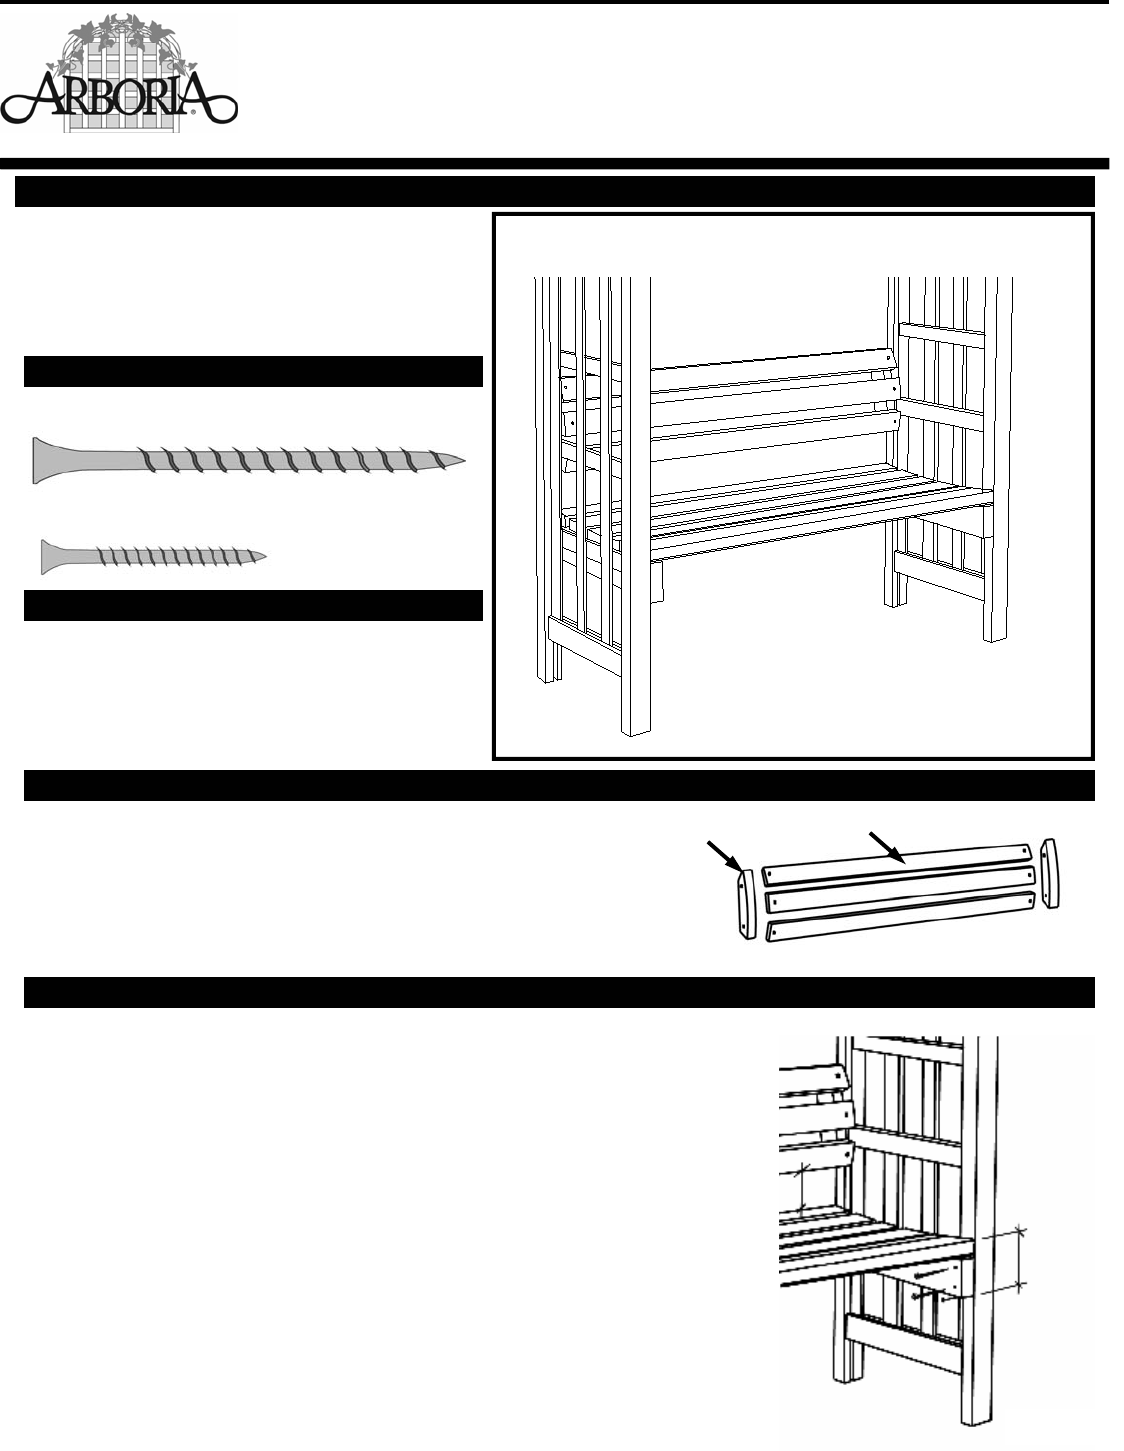
STEP 3
1 5/8” screw (6)
HARDWARE
CHECK BOX FOR THESE CONTENTS
Made in USA 2003
• Seat assembly
• Back rails (total 3)
• Back mounting block (total 2)
• Screws (total 18)
STEP 1
• Line up the outer rails to the edge of the back block with the narrow
end pointing upward.
• Secure the outer back rails using the 1 5/8” screws. Center the middle
rail and secure using 1 5/8” screws.
BACK ASSEMBLY
Block narrow end Back rails
4 3/4”
4”
LWO Corporation, 3841 N. Columbia Blvd., Portland, OR 97217 (503) 286-5372 (800) 459-8718 www.arboria.com