


7
WARNING
WARNINGWARNING
WARNING
SPRINGS, PULLEYS, CABLES AND MOUNTING HARDWARE USED TO BALANCE YOUR
GARAGE DOOR ARE UNDER EXTREME TENSION AT ALL TIMES AND CAN CAUSE SEVERE
INJURY OR DEATH IF DISTURBED. DO NOT ATTEMPT ADJUSTMENT.
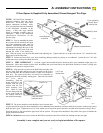
IMPORTANT!
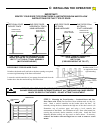
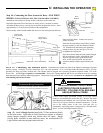
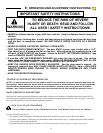
IDENTIFY YOUR DOOR TYPE FROM THOSE ILLUSTRATED BELOW AND FOLLOW
INSTRUCTIONS FOR THAT TYPE OF DOOR
C: INSTALLING THE OPERATOR
SECTIONAL DOOR
CURVED TRACK
ONE PIECE DOOR
HORIZONTAL TRACK
JAMB HARDWARE
HIGH ARC OF
DOOR TRAVEL
HIGH ARC OF
DOOR TRAVEL
TRACK
TRACK
DOOR DOOR
FOR THESE TYPES OF DOORS USE 1/3 HP
MODEL AC9300 OR 1/2 HP MODEL AC9500.
USE 7 FT, 8 FT OR 10 FT RAIL ASSEMBLY
(MATCH DOOR HEIGHT)
104367
ONE PIECE DOOR
NO TRACK
JAMB HARDWARE
ONE PIECE DOOR
NO TRACK
PIVOT HARDWARE
DOOR
HIGH ARC OF
DOOR TRAVEL
DOOR
JAMB
HARD-
WARE
HIGH ARC OF
DOOR TRAVEL
PIVOT
FOR THESE TYPES OF DOORS USE
1/2 HP MODEL ACJ9500.
USE 7J RAIL
(FOR DOOR HEIGHT UP TO 8 FT)
104368
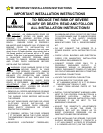
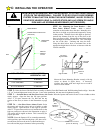
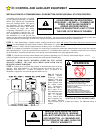
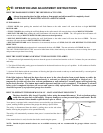
REINFORCE THE HEADER WALL
Reinforce the header wall (wall above the door opening as required,
to ensure rigid mounting of the front wall bracket.
Locate the vertical centerline of your garage door and mark it on the
header above the door and on the top rail of the door.
Vertical Center
Line
Reinforce with 2” x 6”
as required to insure
rigid mounting.
110048
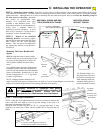
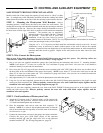
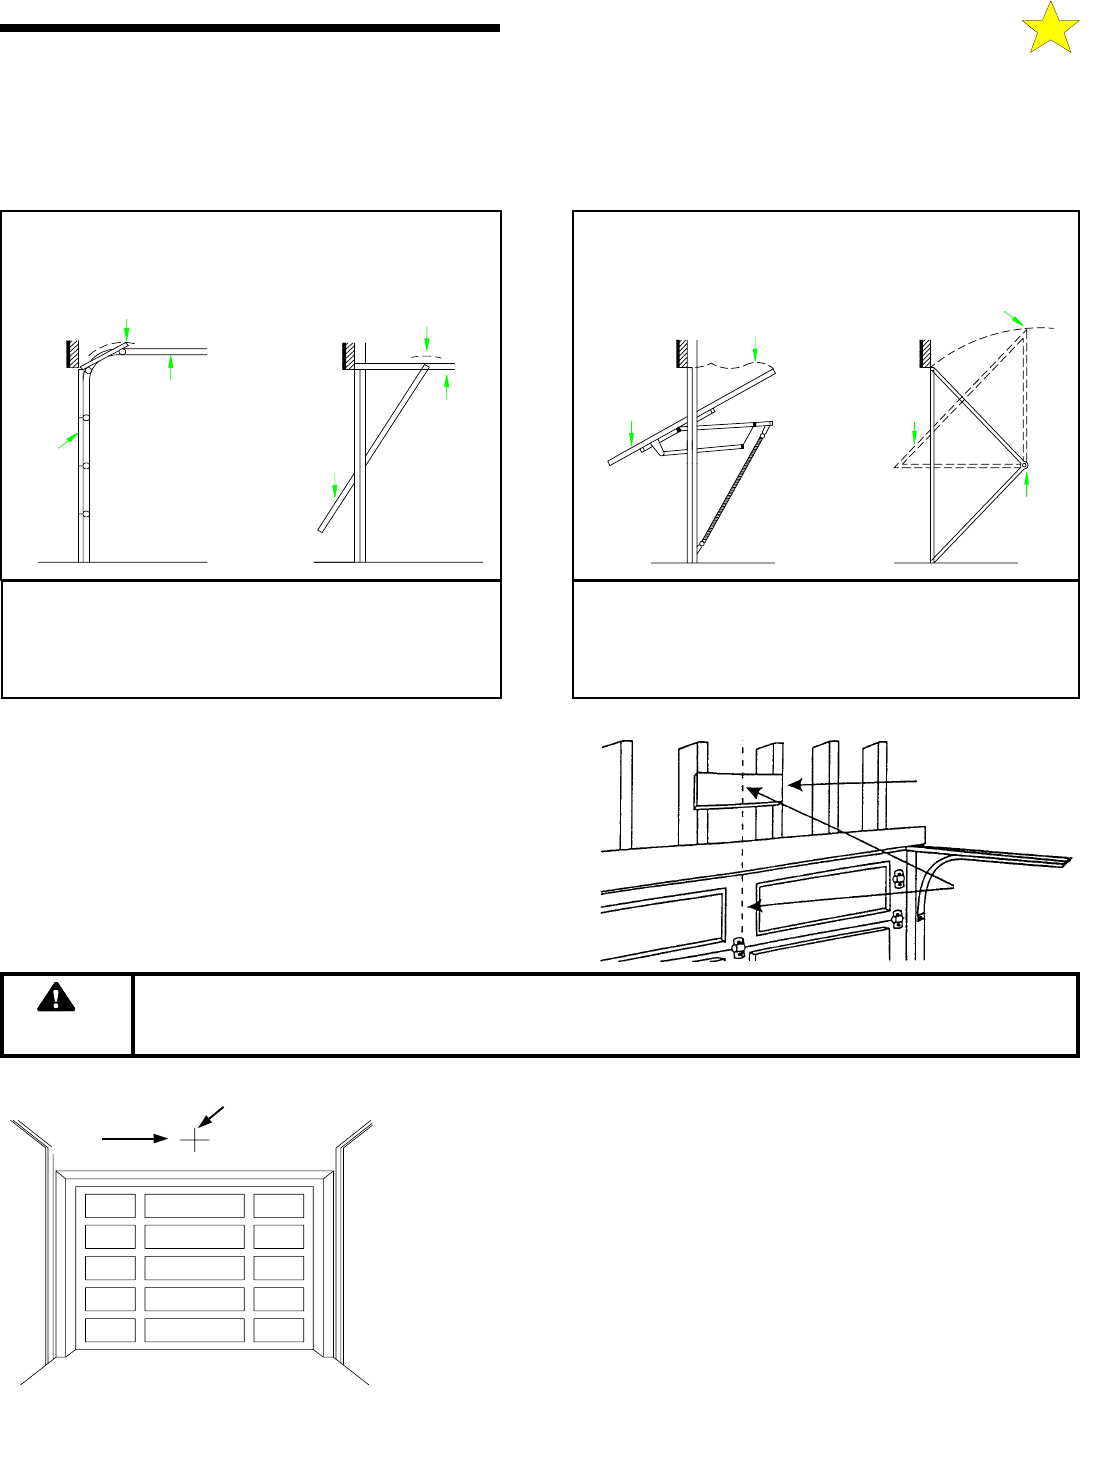
STEP 1: Mounting the Front Bracket — Sectional Doors and One-
Piece Doors with Track (For One-Piece Doors without track see Step 1A,
next): Mark a vertical centerline on the header above the door. By
manually raising the door, determine the high arc of the door’s travel (see
illustration, top of previous page) and using a level, transfer this
measurement to the header (see illustration at left). Draw a horizontal line,
crossing the previously drawn centerline, at this point. Install the Front
Mounting Bracket securely wit lag screws as shown below. If necessary,
reinforce the header with steel angle iron or wood to ensure a secure
mount.
HORIZONTAL
LINE
104369
VERTICAL
CENTERLINE