


18
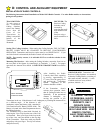
Adjustment #3: Setting Door Close Limit
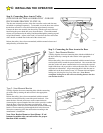
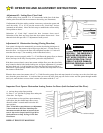
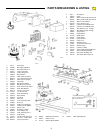
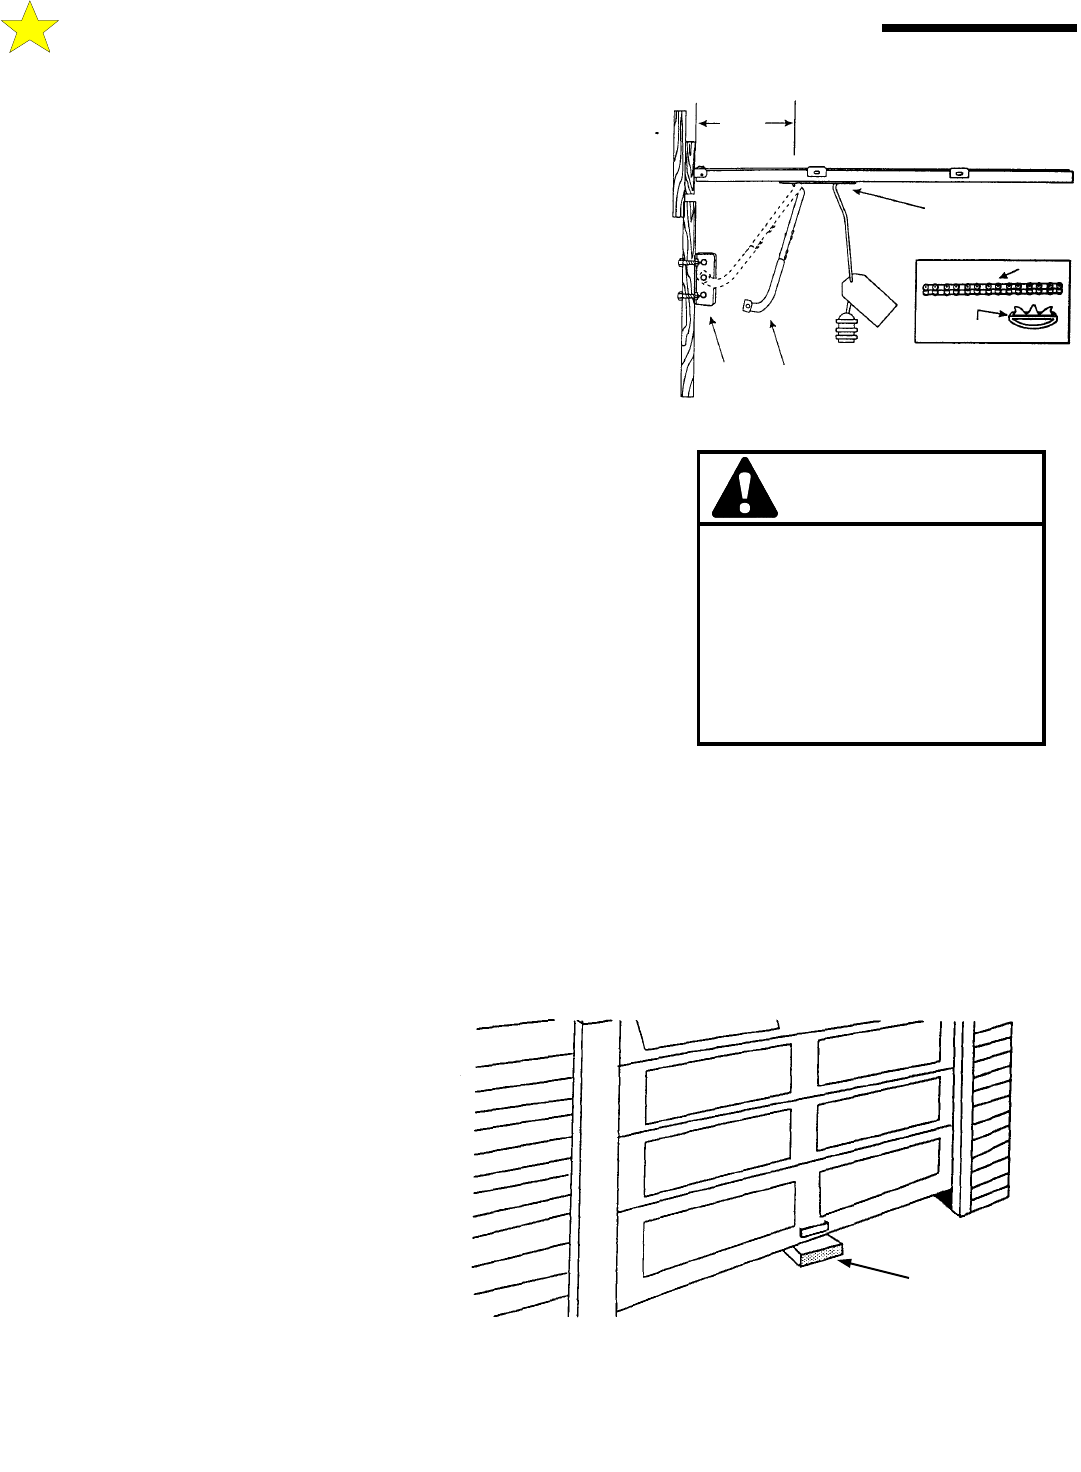
Confirm trolley close position 9” to 10” between the inside face of the door
and the point where the door arm connects to the trolley (see illustration).
If adjustment of the close trolley position is necessary, activate the opener and
move the trolley 12” to 18” to provide access to the “Limit Stop” devices
(mounted on the chain). Move the limit stop to establish the correct trolley
close position as above.
Relocation of “Limit Stop” toward the door increases down travel.
Relocation of the limit stop away from the door reduces down travel. Note
that each chain link provides 1/2” adjustment of trolley travel.
Cushion Arm
Assembly
Trolley
(Close Limit Position)
Door
Bracket
9”to10”
110054-1
Chain
Limit Stop
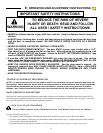
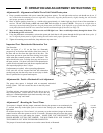
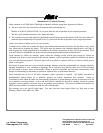
Important Test: Opener Obstruction Sensing Feature for Doors (both Sectional and One Piece)
A. Activate door to the Open position.
B. Place 2” x 4” laid flat on garage floor under path
of the door. See Figure.
C Activate door to close position; upon contacting
solid object, the door should stop, then reverse
direction within 2 seconds and travel to the full
open position.
Note: If the fails to pass this test, see Adjustment
3 above and move the Close Limit Stop one
increment towards the door to increase down
travel. Also review Steps 8 and 9, Page 10 for
Sectional Doors or Step 10, Page 11 for One
Piece Doors.
REPEAT THIS TEST MONTHLY!
Solid Test Object
110055-3
E: OPERATION AND ADJUSTMENT INSTRUCTIONS
Adjustment #4: Obstruction Sensing (Closing Direction)
Your opener is designed to automatically reverse the door during closing travel
whenever it comes into contact with an object up to the last 1-1/2 inch of travel
above the floor. An object on the floor with a height of less than 1-1/2 inch will
cause the door to stop. (Test according to the instructions below.)
If the opener reverses properly with a 2” x 4” laid flat on the garage floor (as the test
below) and stops in the fully closed position, proceed to Adjustment #5.
If the door reverses when it comes into contact with the floor, move the close limit
stop, located on the left side (inside looking out, see figure Adjustment #1), towards
the power head unit. It is advised that you move the close limit stop one link at a
time and run opener through another close cycle, until the door stops when it comes
into contact with the floor.
When the door comes into contact with a 2” x 4” laid flat on the garage floor and stops intends of reversing, move the close limit stop
away from the power head unit. It is advised that you move the close limit stop one link at a time and run opener through another
close cycle, until the door reverses when it comes into contact with the 2” x 4”.
IF LIMITS ARE NOT ADJUSTED
PROPERLY, THE EMERGENCY
RELEASE MECHANISM MAY
NOT WORK PROPERLY AND
DOOR OPERATION COULD
RESULT IN DOOR DAMAGE,
SERIOUS PERSONAL INJURY
OR DEATH!
WARNING
WARNINGWARNING
WARNING