


REPLACING AEROGARDEN BASE
(For AeroGarden Classic, AeroGarden Deluxe, AeroGarden PRO
100
and AeroGarden PRO
200
)
REPLACING AEROGARDEN BASE
(For AeroGarden Classic, AeroGarden Deluxe, AeroGarden PRO
100
and AeroGarden PRO
200
)
© 2008 AeroGrow International, Inc.
300418AA 6/3/08
© 2008 AeroGrow International, Inc.
300418AA 6/3/08
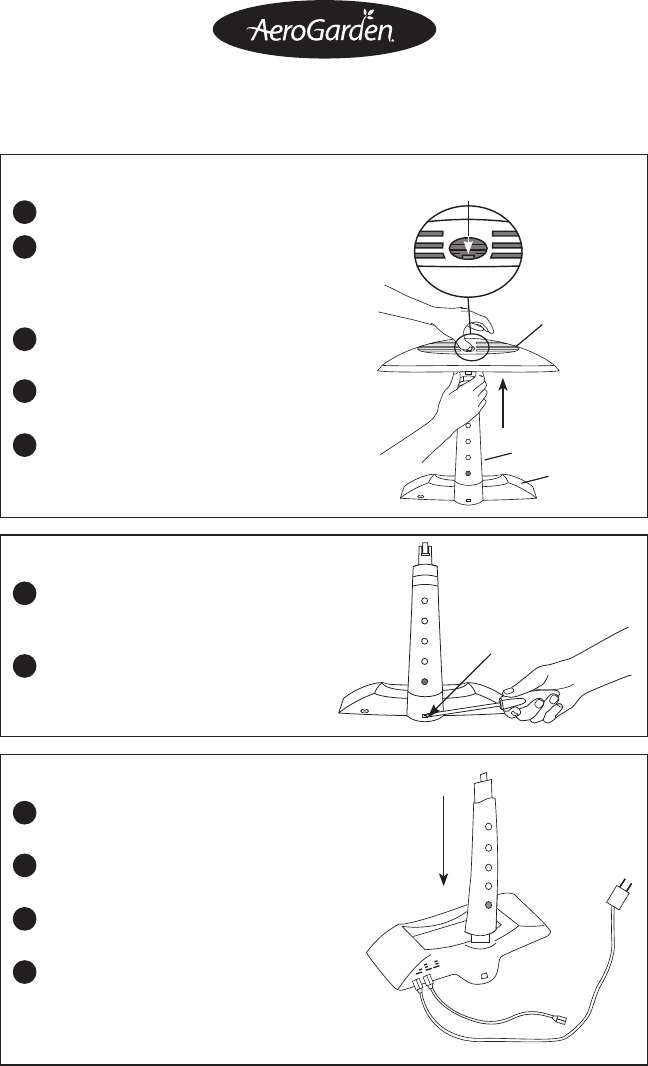
Remove Lamp Hood from Lamp Arm:
Unplug AeroGarden; remove Bowl from Base.
Disconnect Lamp Cord from Lamp Hood
socket and remove Grow Bulbs from
Lamp Hood. CAUTION–Grow Bulbs
may be hot!
Turn AeroGarden around so the back
is facing you.
Press in on Locking Tab 1 located on
Lamp Hood vent.
At the same time, use other hand to
push up on silver ring (where Lamp Hood
attaches to Lamp Arm).
Locking
Tab 1
Lamp Arm
Base
Lamp
Hood
Locking
Tab 1
Lamp Arm
Base
Lamp
Hood
1 1
2 2
3 3
To install Base:
Insert Lamp Arm into new Base. Push down
until you hear a “click.”
Push Lamp Cord rmly into socket in
Lamp Hood.
Center hands over Lamp Arm and push
Lamp Hood down until you hear a “click.”
Insert Grow Bulbs; return Bowl to Base;
plug in AeroGarden.
Refer to your Quick Start Guide for more help
or nd it online at www.aerogardensupport.com.
1 1
2 2
3 3
4 4
4 4
5 5
Remove Lamp Arm from Base:
Push in Locking Tab 2 near the bottom
of Lamp Arm with a screwdriver
or pen.
Pull up on Lamp Arm while pushing in
on Locking Tab 2.
Remove Lamp Arm from Base:
Push in Locking Tab 2 near the bottom
of Lamp Arm with a screwdriver
or pen.
Pull up on Lamp Arm while pushing in
on Locking Tab 2.
1 1
2 2
Locking
Tab 2
Locking
Tab 2
Lamp Arm Lamp Arm
Base Base